Friday, February 13, 2009

Chocolate French Toast with Sauteed Bananas

French Toast


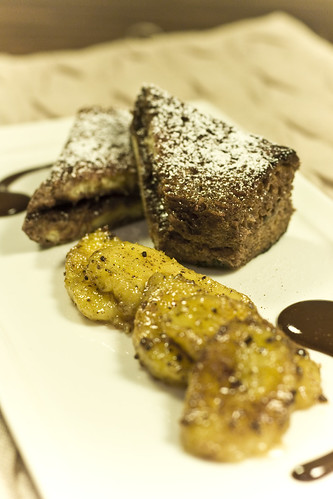
Need something sweet to start your day? Or perhaps end your day? This can be made in several ways to accommodate either. In my picture I have plated this as more of a dessert, but it's also very easy to simplify this a bit and turn it into a suitable breakfast or brunch item. I love french toast, or pain perdu as it would be called if you were in french bistro. French toast can take on many variations. Perhaps one of my favorite is sandwiched with some turkey or ham and then topped with fried eggs and maple syrup! I'll have to post that one of these days. For today I have added some cocoa powder to my standard french toast custard. I'm not sure that I can pick up a strong cocoa flavor, but it definitely adds more depth to the french toast. For breakfast I would soak the bread and cook as normal serving it with maybe some lightly sauteed bananas or fresh bananas and some honey or maple syrup. For dessert as pictured here I have sandwiched slices with chocolate chips and served it with more chocolate sauce and caramelized brown butter bananas. If you have never experienced it, chocolate and bread are a fantastic combination!

Chocolate French Toast (custard enough for 3-4 servings)


The best bread for french toast is challah, or brioche but any sturdy bread would work well.
This custard can easily be doubled or tripled for more servings.

1/3 cup whole milk or 2%
1 egg
2 TBS cocoa powder
1 TBS sugar
1/2 tsp vanilla
1/2 tsp bourbon (optional)

1 cup chocolate chips or chopped pieces of your favorite chocolate

Whisk together the egg, cocoa powder, sugar until completely combined. Add the milk and bourbon and vanilla. Slice the bread into 1/2- 3/4" slices. Heat up a griddle or saute pan, lightly grease with butter or pan spray. Dip slices of bread into the custard, letting it sit for 30 seconds to soak up some of the custard and shake off the excess before placing it into the pan. The bread will burn if the heat is too high, so keep it on a medium low heat and let it cook until the first side is cooked but not too dark (it will be hard to tell because it's chocolate but you should see some crust form). After you flip the bread over sandwich two pieces together with the chocolate. Arrange some chocolate on one piece and top with another piece of the toast, making sure the cooked side is facing in, touching the chocolate. As the chocolate melts it will help to hold the two pieces together. Cook until the bottom is not to dark but has form a crust, then gently flip the sandwich over and cook the other side. After cooking you can transfer them to a 250 degree F oven to keep warm until serving.
Alternatively:
You can dip and sandwich the pieces of bread together (with chocolate in the middle), brown both sides (of the sandwich) and then finish cooking in the oven at 375 until the sandwiches are cooked through and the chocolate is melted, about 15 minutes depending on how cold the sandwiches are going in. This lets you prepare this ahead of time and you can put them in the oven right before serving.

Sauteed Bananas
For the bananas, briefly saute them in some brown butter* Use about 1/2 TBS per banana and then sprinkle in some confectioners sugar to taste and a pinch of salt. Add thick slices of banana to the pan and cook them over medium high heat until you begin to get a little color on them, but they still are firm in the middle. Make sure not to cook them too long or they become mushy and fall apart.

*For brown butter, let the butter melt over low heat until the milk solids begin to brown (not burn) and the butter takes on a nutty aroma
After the sandwiches come out of the oven slice them in half on the diagonal, sprinkle with some powdered sugar and serve with the sauteed bananas. You could also serve this with some chocolate sauce and or whipped cream or ice cream.

For Breakfast:
For something not quite as sweet, you can cook the french toast as normal and skip sandwiching with the chocolate. I would still serve it with bananas (because I love them!) but they could either be fresh or still lightly sauteed and drizzle some honey or maple syrup on top.

Thursday, February 12, 2009

Chocolate Mousse and Cocoa Nib Panna Cotta

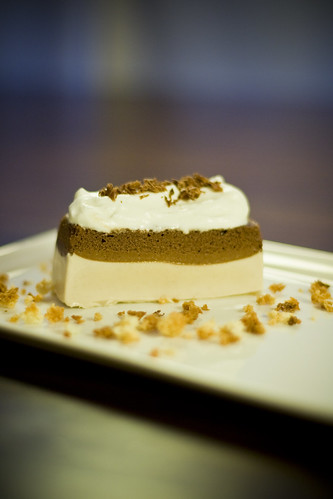
Today's post is something a little more involved- if you want it to be. Both of these recipes are wonderful enough to serve on their own, as shown in the pictures, but together the create a visually stunning and texturally contrasting dessert. It looks impressive but really isn't all that difficult to pull off. It can also be made ahead of time which makes it a great end to a dinner party!
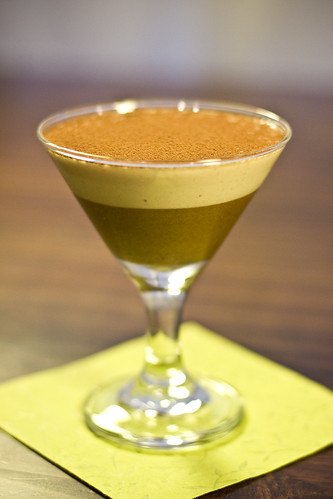
Penna Cotta4
Penna Cotta3
Chocolate mousse and panna cotta layered in flex mold and turned out, sprinkled with coconut macaroon. The same dessert layered in a martini glass topped with a thin dusting of cocoa powder


This recipe for chocolate mousse came from Bittersweet by Alice Medrich. I'm sure that is familiar to you by now if you've read the past few posts. Yes, this is my go to book for anything chocolate related, not my only chocolate book, but so far my favorite and most reliable. There are a lot of different ways to make chocolate mousse, using different ingredients to give you different textures and characteristics, which is why you will see so many different recipes. The classic will use eggs that are separated, and the yolk is added to melted chocolate and butter, the whites are whipped to a soft peak and folded in along with some whipped cream. It produces a great mousse. I chose this recipe though because it leaves the cream out (with the intention of garnishing with it instead) which concentrates the chocolate flavor and makes for a more intensely flavored mousse. That in turn pairs well with the creamy panna cotta I have layered with it. Without the addition of cream this also makes it dairy free.
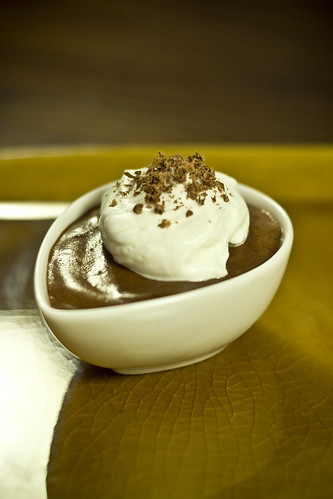
Mousse-2
Mousse
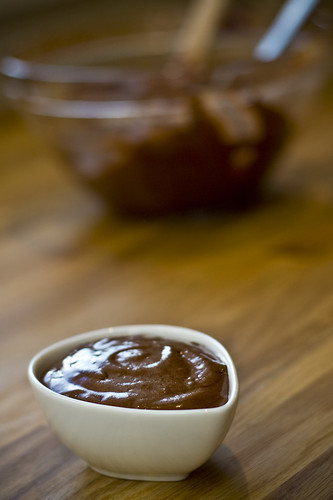
Chocolate mousse served simply with some slightly sweetened whipped cream

Chocolate Mousse ("Albert's Chocolate Mousse" from Bittersweet by Alice Medrich)
Serves about 6-8
You can cut this recipe in half if you choose to use this in conjunction with the panna cotta for a layered dessert for 6 (depending on the size of each portion)

6 oz bittersweet chocolate*
1/4 cup water, coffee, milk or 1/2 cup cream- I used coffee
1
1/2 TBS brandy or other liquor of choice (optional)
3 large eggs at room temperature
3 TBS of water
3 TBS of sugar
Melt the chocolate and water (or other liquid) in a heat proof bowl over a pan of simmering hot water. Stir frequently so it melts evenly and quickly, taking the bowl off after the chocolate has completely melted making sure the mixture doesn't get too hot. (Keep the water hot in the pan- you will be using it again for the eggs) After it is off the heat stir in the brandy, if using.
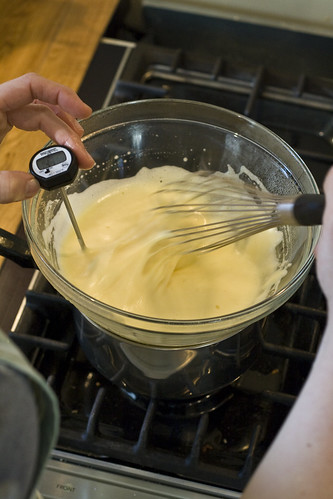
In another medium heat proof bowl whisk together the eggs, the 3 TBS water and sugar. Place this over the pan of hot water and keep the water at a low simmer while you whisk the eggs.
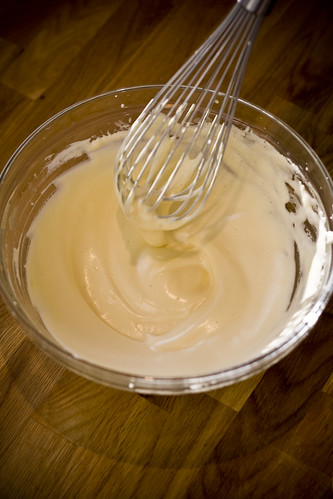
Mix-2
Mix

whipping the eggs over a pan of hot water after the eggs are cooked, whip to cool

It's important to make sure you are whisking all of the mixture the whole time- if the eggs are sitting still in the bowl they will scramble. Keep whisking until the mixture reaches 160 degrees F. Once they are hot enough, take the bowl off the heat and continue to whisk for a few more minutes until the mixture cools slightly (the mixture will also thicken slightly).
Fold the egg mixture into the chocolate (which should still be fairly warm and fluid). Pour into serving container.
You can portion this out into individual glasses or if you want pour into one bowl and let it set up and then scoop into individual glasses. At this point you could also layer into a glass, leaving room for the panna cotta and let it set up in the refrigerator. If you have any silicone molds (they seem to be selling these everywhere these days) you can pour the mousse into the molds and fill it up all the way, or as one of my pictures shows, leave room for the panna cotta. To get the mousse out you want to freeze it solid, then it is easy to pop them out and just make sure you let them completely thaw before serving.
If serving the mousse on it's own I highly suggest garnishing with some lightly sweetened whipped cream.
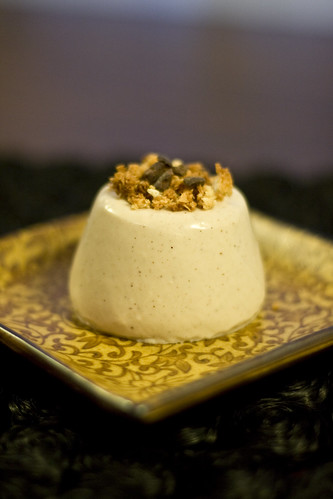
Penna Cotta
Penna Cotta2

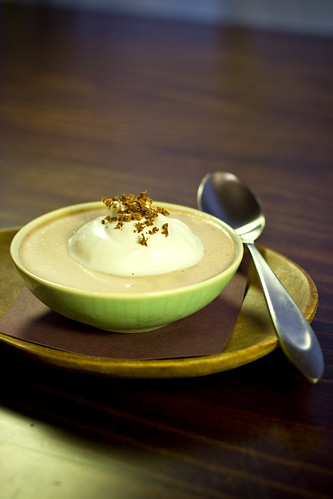
Panna cotta served in a dish with some cream and chocolate shavings and panna cotta unmolded topped with coconut macaroon pieces.

This recipe for panna cotta was a bit of a revelation for me. Most panna cotta recipes are usually a combination of milk and cream the some sugar, flavoring and gelatin to hold it together. It is good, but doesn't have much body to it. I saw a slightly unusual recipe for panna cotta in The Sweet Life by Kate Zuckerman that thickened the milk and cream by cooking it with egg white before adding the gelatin. It uses the same method used to make creme anglaise, and then is set with gelatin. The result gave the custard more body and made it addictively good. With that said, this could easily be served on it's own, but is also great layered with the mousse. Panna Cotta can be made using all sorts of dairy, like buttermilk, yogurt, or all milk or other non dairy liquids. The addition of some cream or full fat dairy does give it a certain needed richness. Panna cotta can be infused with all sorts of flavors. Feel free to play around with the flavors. I love to use cocoa nibs (I know this is becoming a very repetitive ingredient lately, but it is "chocolate week"!) infused into the cream/milk because it gives it a great subtle chocolate flavor. Make sure to remeasure the liquid before using it in the recipe as some items can absorb a lot of liquid while infusing.

Panna Cotta (from The Sweet Life by Kate Zuckerman)

This can be cut in half if layering it with the chocolate mousse
1 1/4 tsp unflavored gelatin
1 tsp vanilla (or 1 vanilla bean)
1 1/2 cups heavy cream
1 1/2 cups whole milk
1/2 cup sugar
pinch of salt
4 egg whites
I used 1/4 cup of crushed cocoa nibs and added them to the warm milk and cream and let them sit for two hours to infuse before using. You would do the same if you were using the vanilla bean, scrape out the seeds and put both the seeds and outside of the bean into the custard and let infuse for at least 1/2 an hour before using.
In a small bowl sprinkle the gelatin over 5 tsp of water and let it sit for 5-10 minutes, if the gelatin doesn't dissolve in the water give it a quick stir. The gelatin will absorb all the water as it sits. Heat the cream and milk,with half of the sugar and add the vanilla bean if using, or if you are using cocoa nibs add them now. Let the milk and cream sit covered off the heat for 30 minutes to 2 hours (some ingredients will take longer to infuse into the custard).
To make the custard: put the egg whites, other half of the sugar and salt into a bowl and whisk to combine. Uncover the pan, heat the cream and milk back up and slowly stream it into the egg white mixture, whisking the whole time. Return this mixture back to the heat and make sure the heat is on a medium low. Using a rubber spatula stir the whole time and cook until the mixture reaches 180 F or coats the back of the spoon. If using a thermometer make sure to temporarily take the pan off the stove while getting the reading (so your custard doesn't overcook).
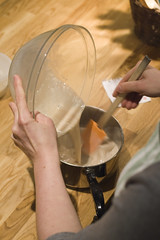
SecondMix-2
SecondMixSecondMix-3
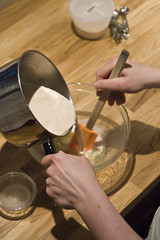
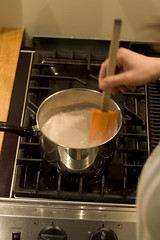
adding hot milk to egg and sugar mix, then pouring back into the pan, returning to the heat to cook until thick

You want to make sure while stirring the custard you are scraping the entire bottom of the pan. If any of the custard sits too long, it will scramble the whites. Also if the the custard gets too hot it can scramble the whites, at which point you want to start over! After the custard is done, add 1/4 of the custard to the gelatin, stir making sure it is completely dissolved, add it back to the pan, then strain the whole mixture, with a fine mesh strainer,into a clean bowl. Chill the custard until it feels neutral to the touch (touch the center of the bottom of the bowl). If you were to take a temperature it should be about 75-80 degrees F. At this point you can pour it into serving dishes, or layer it with the mousse, or put it into a flex mold or a metal mold. If using a flex mold, to unmold you want to freeze it solid, pop it out and let it thaw out before serving. If using a metal mold (like a muffin pan)you can briefly dip the bottom in warm water briefly and invert on to a plate, and the custard will slide out. Alternatively you can use a small glass or cup and turn it out using the same method. You can keep the custard in the refrigerator for up to 3-4 days before serving.
This is wonderful garnished with fresh fruit, and or any small crunchy cookie which provides a wonderful textural contrast.
Wednesday, February 11, 2009

Hot Chocolate with Pecan and Cocoa Nib Cookies

Hot Chocolate


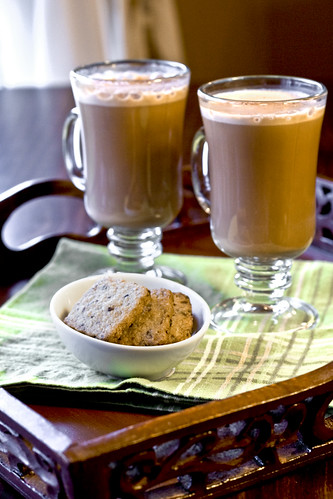
Today's recipe is for hot chocolate and cookies. Because this is "chocolate week" the cookies do have cocoa nibs in them because I like the way they play off of the pecans but they could easily be left out or substituted with finely chopped bittersweet or milk chocolate. Both recipes today come from Bittersweet by Alice Medrich. I will also add one more recipe for a easy hot chocolate mix that provides what many would consider a more familiar hot chocolate and perfect for a quick anytime dessert or for those cold nights while camping!

This recipe, as with all recipes this week, really showcases the chocolate itself. This is called a rich hot chocolate because of the flavor of the chocolate coming through, not necessarily rich in fat or sugar. My husband didn't particularly care for this recipe, but I liked it. It uses half water and half milk with bittersweet chocolate so there is nothing standing in the way of the chocolate flavor. The water also keeps it very light and the milk could easily be substituted with any non dairy option like soy milk or almond milk. If you are looking for something richer you could also use all milk in place of the water. As recommended in the recipe, I made this ahead of time and kept it in the refrigerator and then before serving I reheated it using the steaming wand on my espresso machine. It would be equally as good consumed right away or you could easily reheat it on the stove or in the microwave.

Rich Hot Chocolate
(from Bittersweet by Alice Medrich)
serves 6-8

6 oz of your favorite chocolate (the flavor and sweetness will be determine the flavor and sweetness of the final hot chocolate)
1 1/2 cups boiling water (you could replace 1/2 the water with espresso or use strong coffee)
1 1/2 cups milk

Place the chocolate in a small pan, and pour half of the boiling water over the chocolate. Whisk until it is smooth and the chocolate is completely melted -if you have an immersion blender (hand blender) this would be a great place to use it. Pour in the rest of the water and mix completely, add the milk and over medium heat warm the mixture. You don't want to go much above 180 degrees which means it should never come to a boil, so make sure you keep an eye on it. At this point you could serve it immediately or let it cool and store in the refrigerator for up to a few days.

Hot Chocolate Mix
This is a culmination of a few different recipes I found and it makes for a great cup of hot chocolate. By making your own mix you are able to control how chocolaty or sweet you like it. This could also make a great gift packaged in an attractive jar and maybe accompanied by some homemade marshmallows? (I'll post those at another time). This recipe makes enough to fill a quart jar so if you don't want that much, feel free to cut it in half.

1 3/4 cup powdered sugar (or you could easily use regular sugar and just grind it further in the food processor before adding the rest of the ingredients)
1 cup cocoa powder
1 tsp salt
2 tsp cornstarch
2 cups powdered milk
Optional- You can use all together or just one or two of them....
1 cup malted milk powder
1 tsp cinnamon
1 TBS instant espresso

The key to making this is using a food-processor or blender to grind everything together, it helps to make sure everything is properly mixed and ground so it easily dissolves in the water. If you are using granulated sugar, pulse that in the food processor until it resembles powdered sugar. Add the rest of the ingredients and pulse or blend until completely mixed. To make a cup of hot chocolate, put 1/4 cup of the mix in a cup with 1 cup of boiling water. That will make a pretty strong hot chocolate so feel free to adjust to taste.
For Peppermint Hot Chocolate: Add a few drops of peppermint oil or extract to the hot chocolate
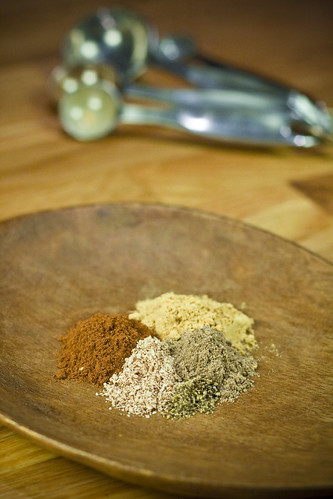
For Spiced Hot Chocolate: There are all sorts of spices you could add to the mix. The following is a little spice mix that I keep on hand and add a pinch to my cup before mixing in the hot water.
1 1/2 tsp cinnamon
1 tsp cardamom
3/4 tsp nutmeg
1/2 tsp ground ginger
pinch of finely ground pepper

Nibby Pecan Cookies (from Bittersweet by Alice Medrich)

1 cup (3 1/2 oz) pecans (or any other nut you prefer)
2 sticks (1/2 lb) butter
3/4 cup sugar
1/4 rounded tsp salt (use a good quality sea salt)
1 tbs + 1 tsp bourbon*
1 1/2 tsp vanilla**
1/3 cup cocoa nibs
2 cups all purpose flour (I used whole wheat pastry flour with great results)

*While you can easily leave out the bourbon if you prefer not to use alcohol, it brings a great flavor to the cookies and is worth going out to get a small bottle.
**As recommended, I tried grinding an old dry vanilla bean I had and used rounded 1/4 tsp of vanilla powder the 1 1/2 tsp of vanilla extract. But to be honest I'm not sure the flavor made much of a difference.

Pre heat the oven to 325 F. Toast the pecans until they darken but more importantly you can smell them. Let them cool and chop finely. Turn the oven up to 350 F.
Cream the butter with the sugar and salt until smooth and creamy but not too light in color. The more you cream the batter the more it will spread in the oven. Add the vanilla and bourbon and continue to mix until it's creamy and emulsified. Add the flour, mix briefly and then add in the cocoa nibs and pecans. At this point you have two different ways to shape the cookies. You can form it into logs and slice and bake (works particularly well if you want to freeze the dough because you can slice it while still frozen and put back whatever dough you didn't use in the freezer for the next time), or as in the picture you can roll out the dough and cut it into desired shapes. If you choose to slice and bake, form it into a log and if you are rolling out the dough, divide it in half and flatten the dough to 1/2 an inch thick and wrap in plastic. Refrigerate until firm (at least 2 hours). Then slice the cookies or roll them out to about 1/4" thick, making sure to add flour as needed on the table to prevent them from sticking. If the dough gets to warm let it firm up in the refrigerator especially after gathering the scraps before re-rolling. Place the cookies on a sheet pan at least 1 1/2 inches apart and bake at 350 F until the edges are golden. Let them sit on the sheet pan for a few minutes to firm up and then transfer to a cooling rack. These will last quite a while in an air tight container.

Spices
My spice mix I like to add to hot chocoalte

Tuesday, February 10, 2009

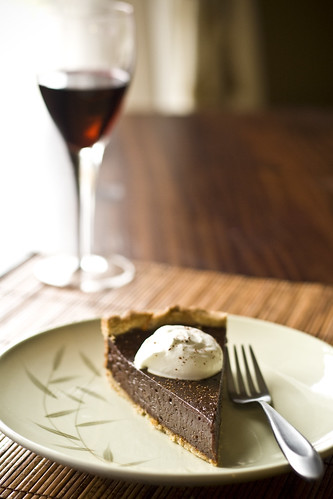
Chocolate Caramel Tart

Chocolate Tart


This tart is full of personality and complex chocolate flavor. Don't be mislead by the caramel, it doesn't provide a lot of sweet flavors but helps to create a more deep and complex chocolate flavor with some background notes of caramel. The hazelnut crust perfectly complements the chocolate. If you don't want to use nuts feel free to substitute with a sweet tart crust. Use your favorite chocolate because the flavor really shines. My "week of chocolate" has given me the oppportunity to revisit all of my dessert cookbooks and find all the recipes I have wanted to try and or share. Today's tart comes from The Sweet Life: Desserts From Chanterelle by Kate Zuckerman. Her book is wonderful, full of great information and interesting flavors and solid techniques, not to mention beautiful photos.

For the hazelnut crust, the following recipe will make twice as much as you need, so feel free to cut it in half or you can easily freeze the left over dough for another tart later on or you can roll out the dough and bake for wonderful cookies.

Chocolate Caramel Tart with Hazelnut Crust from The Sweet Life by Kate Zuckerman
Hazelnut Crust (Enough for two 8-9" tart shells)
1 cup (5 oz) hazelnuts
1 1/2 cup + 2Tbs all purpose flour
1/4 tsp baking powder
1/4 tsp salt
12 TBS (6 oz)butter at room temperature
1/2 cup + 1 TBS sugar
2 yolks at room temperature

Equipment: you will need an 8 or 9 inch tart shell that is about 1-2" high

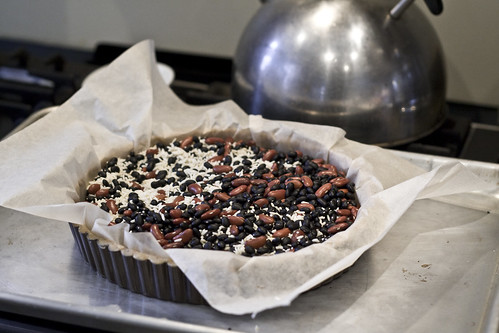
Grind the hazelnuts in a food processor with 1/4 cup of flour until you have a fine meal. Add to the rest of the flour, baking powder and salt. (Alternatively if you already have hazelnut meal, you can substitute that for the whole hazelnuts and skip the grinding all together.) In another bowl, cream the butter and sugar until the mixture lightens in color. Add the egg yolks, one at a time mixing until they are completely emulsified into the butter. Add the dry ingredients all at once and mix until thoroughly combined. Divide the dough into two portions (if using whole recipe) and then wrap the dough with plastic and press down so that it's about 1/2" thick. Let it chill until firm (or you can make it a day ahead and leave it in the refrigerator over night). You can freeze any leftover dough or use it to make rolled out cookies. To roll out the tart shell roll one portion of dough out so that its about 1/8" thick and in a rough circle shape. Place your tart pan over the dough and make sure the circle is big enough so when you place it in the tart pan there will be enough to go all the way up the sides as well as the bottom. Line the tart pan with the dough paying particular attention to the bottom edge, making sure the dough is pressed all the into the edge. Freeze it until solid (about 1/2 hour). Pre heat the oven to 350 F and take the tart pan out of the freezer. Line the tart shell with parchment paper and fill it with either pie weights or dried beans or rice. Bake for 30 minutes until the dough is almost baked through, take the shell out of the oven, remove the beans and bake for an additional 10 minutes or until the bottom of the dough is a light golden brown. The baked shell can be saved for up to two days well wrapped at room temperature.

Tart Shell


Chocolate Caramel Filling

1 cup sugar
1 cup heavy cream
6 oz bittersweet chocolate
8 TBS (4 oz ) butter
5 egg yolks
1 egg
1/4 tsp salt

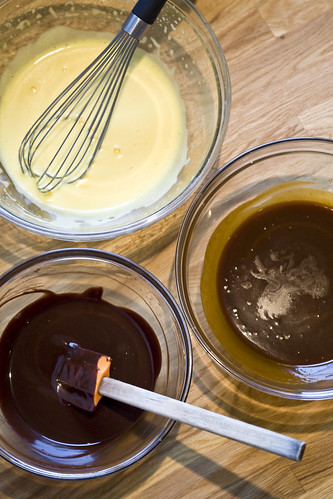
Turn the oven down to 325 F. In a medium saucepan combine the sugar with 1/4 cup of water and bring to a boil and continue to let it boil until you see the sugar start to caramelize. For tips on cooking sugar refer to my post for caramel sauce. You want to make sure you get a nice dark amber color before taking the sugar off the heat. While the sugar is cooking heat the cream in a small saucepan or in the microwave until warm to the touch. When the sugar is at the right color take it off the heat and slowly add a little cream. You'll see the sugar bubble up quickly, so don't add too much at first. When it subsides, stream in some more cream, wait for it to finish bubbling making sure to whisk the whole time and then when those bubbles subside you can slowly pour in the rest of the cream. By this time the mixture will have cooled down slightly and won't bubble up as much. If you find that there is still hard bits of sugar in the pan you can return the pan to the heat and let the mixture come back up to a boil to melt any hardened sugar. Pour into a bowl and let it cool sightly. In another bowl, melt the chocolate and butter together over a pan of hot water (or you can melt it in the microwave). Make sure you only keep it on the heat long enough to melt chocolate and butter so the mixture doesn't get too hot. While the chocolate is melting combine the yolks and whole egg in a bowl and whisk until the mixture is light and foamy.

Three Bowls
Starting at the top: the whipped eggs, to the right is the caramel, the bottom left is the melted chocolate and butter all right before being mixed together.

Slowly whisk in the chocolate mixture to the eggs, and once that's mixed, whisk in the caramel sauce. Pour this into the prebaked tart shell and return it to the oven to bake until it is set (about 30 minutes). To check for doneness shake the pan gently and if you see a large ripple, the custard is not set, but if it shakes together like jello take it out. Additionally you can gently touch the center of the custard and as long as nothing sticks to your finger it is ready to come out of the oven. Let the tart cool in the pan on a cooling rack before unmolding the tart. This can be served slightly warm or at room temperature with some lightly sweetened freshly whipped cream or ice cream. The tart is best served the same day, but can be kept in the refrigerator for up to 4 days. Because of the onslaught of dessert I have frozen this after photographing the tart, and when I pull this out of the freezer I'll let you know how it holds up!

Monday, February 9, 2009

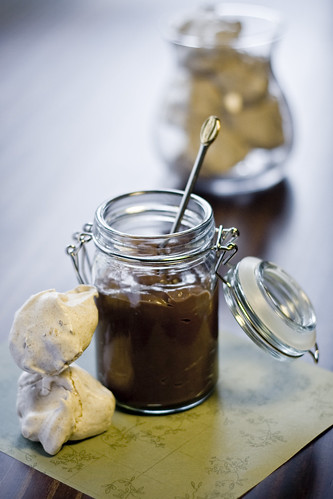
Chocolate Pudding with Cinnamon Hazelnut Meringues

If you have never made your own chocolate pudding you are missing out! It is so simple but the results are incomparable with anything you could buy in the grocery store or make from a mix. I have paired the pudding with some meringue cookies. These are also very easy to make and the opportunity for flavor is endless. Here I've added some cinnamon, toasted hazelnut and cocoa nibs. It brings an element of chocolate that is subtle but will pair well with the creamy pudding.

Pudding


The pudding recipe came from a great book called In The Sweet Kitchen by Regan Daley. It has a lot of great recipes with wonderful flavor combination's. It has great step by step instructions for beginning bakers but a lot of very useful ingredient information for people looking to learn more. Check it out!

Deep Chocolate Pudding (from In The Sweet Kitchen by Regan Daley)
Serves 6-8

1 cup sugar
4 TBS cornstarch
1/3 cup 1TBS cocoa powder
pinch of salt
2 1/2 cups low fat or whole milk
4 egg yolks
1/2 cup heavy cream
1 tsp vanilla extract
4 oz good quality bittersweet or semisweet chocolate

In a medium size bowl, combine half the sugar, cornstarch, cocoa powder, egg yolks and 1/2 cup of milk, whisk until completely combined. In a medium saucepan combine the rest of the sugar, milk and cream. Bring to a scald, the point before it starts to boil. Slowly whisk the hot milk into the sugar and cocoa mixture. Return to the saucepan and cook over medium high heat until you see it begin to boil. Bring it to a full boil and take it off the heat. Add the vanilla and chocolate and stir until completely melted. Pour into a clean bowl and place a piece of plastic over the top on the surface of the pudding to prevent a skin from forming. Let it cool completely before serving. This can easily be made a day before serving. Serve with some slightly sweetened freshly whipped cream.

Meringue Cookies


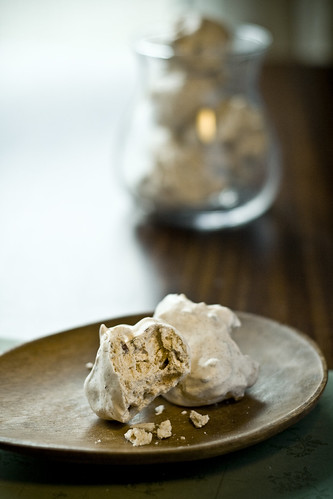
Meringue Cookies
These cookies have an endless possibility for flavor combination's. You can fold all sorts of things into them like nuts or chocolate, flavor them with zest, extracts, spices, use different sugars, fold in cocoa powder... They are simple to make and bake at a very low temperature for a long time so you can make these before you go to bed, let them cook all night (on the ovens lowest setting) and they'll be ready by morning.

Cinnamon, Hazelnut, Cocoa Nib Meringues
4 lg ( 4 oz) egg whites at room temperature
1/4 tsp cream of tartar
1/2 cup and 1 tsp(4 oz)granulated sugar
1 cup (4 oz)sifted powdered sugar
2 tsp cinnamon
1/2 cup toasted hazelnuts finely chopped
1/4 cup cocoa nibs finely chopped

Pre heat the oven to it's lowest setting- for me it was 170 degrees F. Anything 200 degrees or below will work. The directions are fairly simple, whip the egg whites, add sugar, fold in powdered sugar and then fold in nuts and nibs. The key to success in this procedure lies in not adding your sugar too fast to your whites, if you do the whites get weighed down and runny and won't ever whip up properly. Make sure that your whites are at room temperature so you get the maximum volume from them. Put them in a clean, grease free large bowl, add the cream of tartar and begin to whip. This is possible by hand, but if you can do it with an electric beater it will be a lot easier. When your whites are foamy and beginning to form soft peaks, sprinkle in a tablespoon of sugar. Let the beater continue to whip and slowly sprinkle in more sugar. By the time your whites reach a firm peak you want to have about 1/2 of the granulated sugar added in. Keep the beater whipping and slowly sprinkle in the rest of the sugar. Whip until the peaks are very stiff and shiny. Sift the powdered sugar and mix in the cinnamon. Fold- don't whisk the powdered sugar into the whites. Towards the end add the nuts and nibs. You should still have a fairly stiff meringue at this point. Line 2 sheet pans with parchment (you don't need to grease them). At this point there are several different looks you can create with your meringue. As shown in the picture you can create rustic little mounds by just dropping spoonfuls on to the sheet pan, or if you want something more uniform and clean, you can also pipe them using either a plain or star tip. Make sure that if you are going to pipe them, your nuts and nibs are very finely chopped and that you use a fairly large piping tip. Cook them until they are dry throughout. You can just leave them in the oven overnight. If you have a pilot light on your stove you can even turn the oven off and let it sit overnight. The pilot light provides enough heat to dry them out. Expect them to take at least 4-6 hours in the oven but it won't hurt them to be in there longer. You want to make sure the oven doesn't get much past 200 degrees F so they don't get much color (the sugar starts to caramelize). To test for doneness break one open and make sure the middle is firm (let it sit out on the counter to cool before testing). You can leave them plain or dip them in chocolate. Store in an airtight container for a week.

Sunday, February 8, 2009

A Week of Chocolate

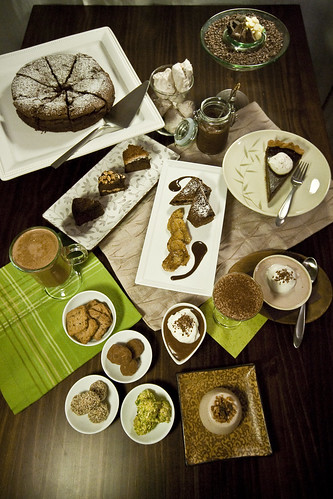
I may be a little crazy, a little too motivated, but I am planning a post a day for the next week. Each post is a chocolate dessert to inspire all of those looking for something sweet to make to celebrate a certain upcoming holiday. I don't usually do much, but I do celebrate Valentines day, but I also believe that you should show those you love how much you care for them more than once a year. I do think that chocolate is such a wonderful thing that it does deserve to be officially honored at least once a year and isn't that half of what valentines day is about? Chocolate and sweets? So the items I have chosen to share with you definitely highlight the flavors of chocolate. Some of the recipes are simple and straight forward while others require a bit more work. I may be a little crazy because I have made them and with the help of my photographer, have photographed them all this weekend in preparation for a post a day throughout the week. We both agreed not to do that again, but are very happy with what we ended up with. Below is a picture of what you have to look forward to, followed by my first post. Check back each day for a new recipe and idea if you need something for next weekend. Just a reminder, sign up for email updates to be notified every time a new entry is added. Thanks for reading and leave me some comments and let me know what you think!

Chocolate Week Collection


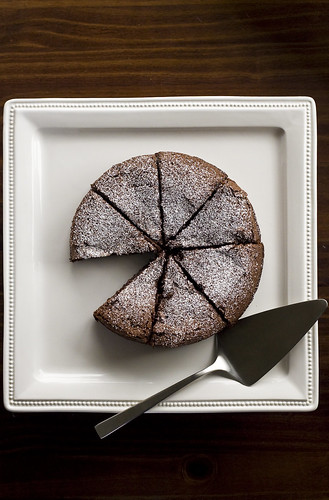
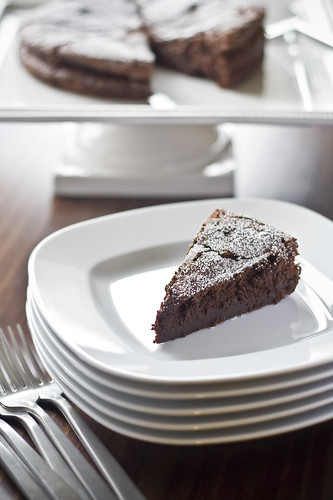
My first recipe I want to post is a cake that I have made quite a few times. It is a chocolate souffle cake, but the good news is it's supposed to fall, which means you can make it ahead of time and is a little more foolproof than a traditional souffle. It is also low in fat and high in flavor. It isn't too sweet but has a wonderful chocolate flavor that is clean and straight forward. This could be served with some fresh or poached fruit, a fruit sauce, some whipped cream or ice cream. It's the little black dress of desserts (and a dessert that will keep you fitting into your little black dress!) I cannot take any credit for this recipe however, it comes from the wonderful Alice Medrich and her book Bittersweet.
Chocolate Souffle Cake


Fallen Chocolate Souffle Cake (taken from Bittersweet by Alice Medrich)

serves 10

1/4 cup (1 oz) blanched almonds (or almond meal if you have it)
3 TBS all purpose flour
3 oz bittersweet chocolate (or semisweet)
1/2 cup cocoa powder
1 cup sugar, divided
1/2 cup boiling water
2 large eggs separated, room temperature
1 TBS brandy
2 large egg whites
1/4 tsp cream of tartar

Pre heat the oven to 375 with your rack in the lower third of your oven. A spring form pan or a pan with a removable bottom works best for this recipe. To prepare the pan, grease the bottom and sides and line the bottom with a round of parchment paper.
If you are using whole almonds, using a food processor grind them with the flour to a fine powder. Set aside. In another bowl mix the chocolate, cocoa powder, 3/4 cup of sugar. Pour the boiling water over the mix and whisk until smooth. Add in the egg yolks and brandy. In another bowl put all 4 egg whites and the cream of tartar. Whip the egg whites until soft peaks form and gradually sprinkle in the last of the 1/4 cup of sugar. Whip until peaks become stiff but still shiny. Fold the flour mix into the chocolate and then fold in 1/4 of the egg whites. Once the chocolate mix has lightened fold in the rest of the egg whites. Scrape the batter into the prepared pan and bake for approximately 30 minutes. You will know it's done when you insert a toothpick in and it comes out with a few crumbs stuck to the toothpick. If there is still a lot of batter bake a little longer. Make sure not to bake too long, watch it closely, you don't want to over bake it! Let it cool slightly in the pan and run a knife around the edge to loosen the cake if necessary. Garnish with powdered sugar and serve plain or with the embellishment of your choice. This is great a few hours out of the oven but you can make this a day ahead and keep it covered at room temperature overnight.

Chocolate Souffle Cake2

Wednesday, February 4, 2009

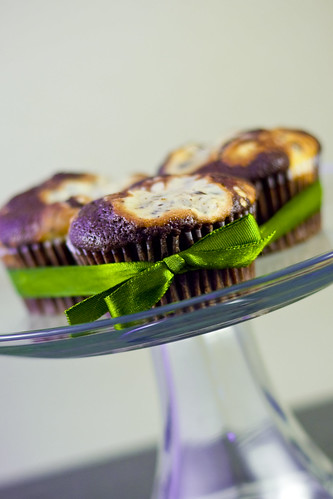
Chocolate Cream Cheese Cupcakes

_MG_0037-2

These are also referred to as Amazon Cupcakes. They are a chocolate cupcake that has pockets of a cheesecake like filling baked into the cupcake. They are very simple to make, require no frosting and are very very good! The better quality your cocoa powder and chocolate you use will make a big difference in the final flavor of the cupcakes.

Chocolate Cream Cheese Cupcakes (makes 24 cupcakes)

Chocolate Batter:
3 cups all purpose flour
2/3 cup cocoa powder
2 tsp baking soda
2 cups sugar
1 tsp salt
2 cups cold water
1/2 cup + 2 tbs vegetable oil
1 TBS vanilla extract
2 TBS lemon juice or white vinegar

Pre heat the oven to 350 degrees F. Sift the dry ingredients together, in another bowl mix the water, oil, vanilla and lemon juice or vinegar. Add half of the wet to the dry, mix until evenly distributed and slowly add the rest of the wet (add this slowly will prevent lumps in the batter). Set aside while you make the cream cheese filling.

Cream cheese filling

12 oz room temperature cream cheese (neufchatel also works)
1/2 cup sugar
2 room temperature eggs
1 1/4 cups chocolate chips (or your favorite chocolate cut into small pieces)

Cream together the cream cheese and sugar until there are no lumps left, make sure to scrape the bowl and your spatula well to get any cream cheese that can be hiding. Slowly add a little bit of the egg at a time, mixing completely before your next addition, aiming for about four additions of egg. Stir in the chocolate chips last.
Prepare a muffin pan with paper liners (or grease the muffin pan well if you don't have paper liners) this can also work with mini muffin pans as well. To scoop the batter into the pans, you are going to alternate the chocolate batter with the cream cheese batter ending up with about 3 layers of chocolate cake batter and two layers of cream cheese batter. The scoops for the chocolate cake batter should be slightly larger than the cream cheese batter. Start off with about 2 tbs worth of chocolate cake batter in the bottom of each cup. Then scoop a heaping 1 tbs of the cream cheese batter and repeat once more and then finish off with another layer of chocolate cake batter on top (you want to evenly distribute this over all the cupcakes, so depending on how much is left in your bowl, the last layer of chocolate cake batter may be less than the other two.) Your cupcakes should be about 3/4 full, it isn't going to rise too much. Bake at 350 degrees F until the cupcakes bounce back when gently pressed in the middle. You can also insert a toothpick into the middle and as long as you see crumbs and not batter then they are done.