What's a girl to do with 2 20 gallon pails of apples? I
did pick them, so I had a few things in mind, but the work never hits you while you are picking apples only when you get home and start unloading the car and filling up your kitchen with apples! Ever since I was a child I have been eating fresh homemade applesauce- nothing compares. Every Friday night I would peel apples that would go into a crockpot for the night. Saturday morning we would wake up to fresh applesauce and make pancakes to go with them. To this day pancakes simply aren't as good if they don't have warm applesauce to go with them. Nobody ever warns you as a kid that the things you eat will follow you into adult hood whether you like it or not!
As I discovered how easy and rewarding canning is, one of the first things on my list was applesauce (right above apple butter). I try to can enough applesauce to last me through out the year, but it never lasts that long. Applesauce is simple, and it's easy to find good apples so who says you can't make another batch? The apples should be sweet and full of flavor, if they are not as sweet or flavorful, you might have to resort to some sugar for flavor. Golden delicious work really well, but even better is a mix of a few different kinds. I have made applesauce many different ways and only recently have discovered absolutely hands down, the easiest way.
Homemade ApplesauceAll you have to do is wash your apples and cut out the cores- don't worry about the peels. Chop them up into 4-8 pieces depending on the size of the apple. Put them into a dutch oven (a large oven safe pot with a lid) or even a roasting pan covered with some foil. Add a little water just to cover the bottom. Careful, too much water will dilute the flavor of your applesauce. After the pan is full of apples (and you can fill it to the top) put it into the oven at 300 degrees until the apples are so tender they fall apart with the poke of a spoon. Depending on how large and how full your pot was this will be anywhere from 45minutes to 2 hours. I usually like to check on them once or twice and give them a stir. Once they are tender, take the pot out of the oven and turn it off. Let the apples cool briefly and then using a food mill (this piece of equipment is necessary unless the batch is small then you can push the apples through a fine mesh sifter) process all the apples through and what you should be left with is little more than all the skins! At this point you have two options- freeze the applesauce or can it. Freezing works well but I prefer to can my applesauce (there are too many things already that I freeze to put up for the year).
A Quick Lesson In CanningSo the second part of my post is dedicated to how to can. I had eluded to it in my earlier recipe for the cranberry sauce, that I would be following up with some how -to's to show you how easy canning really is.
Canning is one of those mysterious things in the culinary world that puts everyone in two groups. There are the people who think that canning is very complicated and involves lot's of special equipment and expertise, and then there is the other half that may have thought that at one time but have come to realize that canning runs the gamut of complication. It only needs to be as complicated as you make it... if you want to keep things simple, can items that don't require much work or specific pH's . What things are easy to can? Anything high in acid or sugar. Like jam and pickles- these are the things that are very widely canned. Both of these ingredients make for a unfriendly environment for bacteria to live... There are other things like vegetables or legumes or meats that have low pH and high protein contents that are very inviting for various bacteria and require a little more education and equipment, namely a pressure canner. For items with a lot of sugar or a high pH a water bath canner (ie a large pot with water a inch above the jar) works beautifully.
Investing in a few tools makes the job so much easier. That would be a canning pot with a rack (you don't want the jars directly on the bottom of the pot), and some tools to help maneuver the jars in and out of hot liquid. and then of course the canning jars, tops and rings (to hold the tops on). The jars you can keep and reuse, same with the rings. It's just the lids you need to use a fresh one each time you can (because of the rubber seal that needs to seal to the jar). If you are at all familiar with estate sales, these can be great places to find all the canning supplies you'll ever need, or second hand stores...
Be organized! Clean your kitchen, have everything ready to go before the filling is done and needs to be filled in the jars immediately. This includes giving yourself enough room to work comfortably. This may mean temporarily cleaning your counters off, but this is one of the keys to smooth and easy canning that will keep you coming back for more.
Realize that your first few times canning may be slow and a little awkward, but if you stick with it soon you can do it with your eyes closed (well almost). It's like any new recipe, the first time or two you spend a lot of time going back and rereading the steps to make sure you are doing it correctly and you have everything right. But after it's become a favorite and you've made it several times you find yourself not even looking at the recipe at all.... the same will be for canning. With that said, start out small. I made the mistake of doing marathon canning my first time and I had several different things to can and a lot of each item and I spent ALL day in the kitchen and was overwhelmed and exhausted by the end. It will be a lot more enjoyable as you are getting the hang of things if you stick to one item and only make several quarts (5-7).
Before you can a large batch of something (like tomato sauce) try the recipe and method out first and make sure you like it before you are stuck with 10 quarts of it. Yes, I am speaking from experience! Not every recipe is created the same!
So, to begin, get your applesauce started. Once you fill your jars, you want everything to be hot, so when you put it in the water bath canner (which needs to be back up to a boil before the processing time can start) the hotter the jars, the quicker the water will come back to a boil. There are many different ways to sterilize jars, if you have a dishwasher with a short/small cycle on it, by all means put the jars in there and time it so they are ready and hot when the applesauce is. Or if you're like me and maybe your dishwasher is loud and takes a while, you can sterilize the jars in boiling water. I'll usually wash them with hot soapy water first since most of my jars reside in the garage for a better part of the year, then I'll fill up my canning pot about 2/3's of the way up and bring that water to a boil (we are talking about a HUGE pot of water that usually takes up two burners so don't underestimate the amount of time this will take to boil). After it's boiling, I'll put my jars in the water and let them gently boil for 10 minutes. The rings, need to be washed in hot soapy water and dried, and you can set those aside until you need them. The lids need to stay warm until they are used, so what I'll do about 10 minutes before I can I'll bring a small pot of water to boil and take the pan off the heat and place the lids in there until they are ready to be put on the jar. Then when the applesauce is done and has been through the food mill I'm ready to put it in the jars. If it will be a little while until you actually put the applesauce in the jars, put it in a pot and keep it warm on the stove or in the oven. When everything is ready and you have everything in place you can take the applesauce off the heat. Using a ladle and a funnel (wide mouth for canning) take the jars out of the water, emptying all the water from inside the jar back into the pot, fill the jars up leaving 1/4" of head space at the top*. Make sure the rim is ABSOLUTELY clean- any little particles of food will prevent a proper seal of the jar. Every thing is set and ready to go.
 Timing is something that takes practice but when you do have it down, canning is a very easy and smooth process
.
 Everything is in a line, the the pot at one end, then the unfilled jars, then the rings and lids... all in the order in which they are needed. It keeps everything clean, neat and accessible.
After all the jars are full, wipe around the rims of the jars with a clean cloth and place the lids on the jars. Top each with a ring and tighten lightly. After all the jars are done, pull the rack out of the canning pot, fill with the jars and put back into the water. Let the water come to a boil then time it for 20 minutes (for canning quarts, pints will have a slightly less processing time). Make sure it is a gentle rolling boil. After the required time, take the jars out carefully making sure to keep them right side up, and place them on the counter. Let the jars cool undisturbed until you hear a pop (this will be the jar cooling off and creating the suction which will keep all the oxgyen out of the can and seal the jar). If you don't hear a pop, and when you try to pry the lid off (gently) if it, it comes off, you can either keep that jar in the refrigerator or reprocess the jar again. I would empty out the contents and heat it back up while sterilizing the jar and start the process all over again. I would only go to this trouble if a number of my jars were unsuccessful in the seal. Otherwise, keep it in your refrigerator or freeze it in a plastic bag. Make sure to label and date your product, so 6 months down the road you know what it is and which jar to use first (the oldest!).
Hopefully this has taken some of the mystery out of canning and I have inspired you to try it for your own. There is nothing like going to garage for a jar of summer peaches or applesauce and to open it up, and for it to taste as good as the day it was made or the day the peach was picked! It's a great way to eat locally all year round but be spoiled by summers bounty in the cold dark days of winter!
www.pickyourown.org is the website that I get most of my canning information and guidance from. Here is the link for
applesauce in case some of this information is very unfamiliar or you need to see some visuals for the tools that are helpful for canning- this page can be a great resource
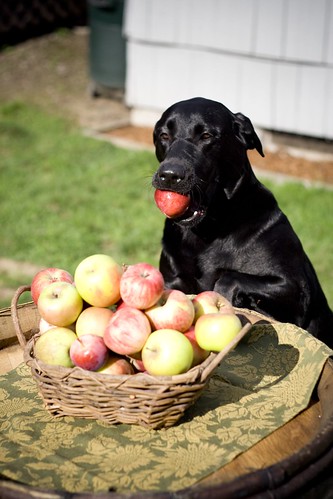
 Couldn't resist adding this picture of our loving lab- Puma who for the record we encouraged to jump up and help himself to an apple- normally he is very polite and will not touch human food!
* head space will vary for different products. It's important to follow the recommendations. Too little room and your product could come out of the can before it seals and too much air or headspace left inside can leave an inadequate seal. I've been off (too much room) before by a 1/4 " an inch or so without a problem, but I have put too much in before and it bubbles out of the jar as it is processing... not good.


