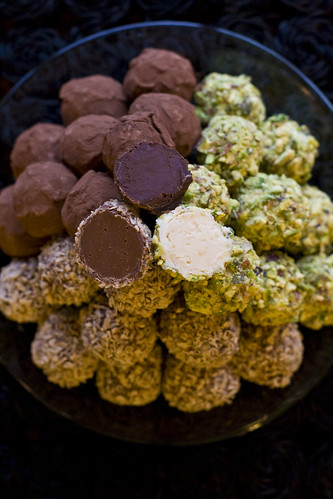
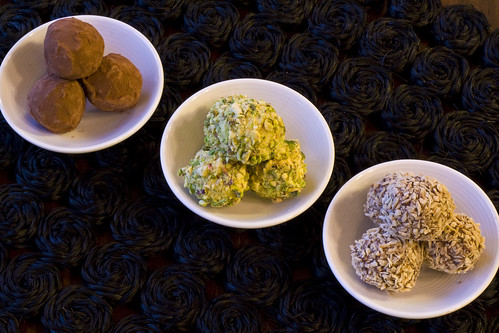
Dark Chocolate
Normally you would use 54% of the weight of chocolate in cream which means that if you had 4 oz of chocolate you would use 2.2 oz of cream (multiply 4 oz by 54%). But since I wanted to use a higher percentage chocolate 75% I needed more cream and got this formula from Bittersweet by Alice Medrich. Because the chocolate is extra bittersweet the lack of sugar affects how the chocolate acts, requiring more cream and a slightly different formula. I will also post a formula that would work well with a lower bittersweet or semisweet chocolate.
Bittersweet Truffles (from Bittersweet) this will make about 40-50 truffles
1 cup plus 2 TBS heavy cream (if using a chocolate that has 66% chocolate solids increase the amount to 1 1/4 cups)
10 oz of bittersweet chocolate labeled 66-72%
* next time I would include 1 TBS (.5 oz) of butter
OR
10 oz of bittersweet or semisweet chocolate (below 66%)
1/2 cup plus 2Tbs and 1 tsp of heavy cream
1 TBS (.5 oz) very soft butter
1 cup cocoa powder for coating the outside of the truffle
8 oz dark chocolate for dipping the truffles
Milk and White ChocolateFor milk and white chocolate you use 33% of the weight of chocolate in cream, because the chocolate itself has a lot more milk solids and sugar, if you use the same amount of cream as you would dark chocolate your base would never be firm enough to be able to roll out.
Caramel Milk Chocolate Truffles (will make about 25 truffles)
6.5 oz milk chocolate
1/3 cup plus 4 tsp (3.25) oz sugar
1/2 cup plus 2 tsp (4.3 oz) of cream, warm to the touch
1 cup toasted unsweetened coconut for coating the outside of the truffle
8 oz milk chocolate for dipping the truffles
For this formula caramelize the sugar by combining the sugar with 3 tbs of water and cook over high heat until the sugar is a dark golden brown. Pour in the cream in a slow stream whisking the whole time. Let this cool and proceed with the basic directions.
White Chocolate and Grapefruit Truffles (will make about 25 truffles)6.5 oz of white chocolate
2 TBS (.5 oz) of heavy cream
2 Tbs (.5 oz) of fresh grapefruit juice
3/4 tsp of freshly grated grapefruit zest
1 cup toasted pistachios finely chopped, for coating the outside of the truffle
8 oz of white chocolate for dipping the truffles
Add the zest and the juice just before the cream is completely mixed into the chocolate.
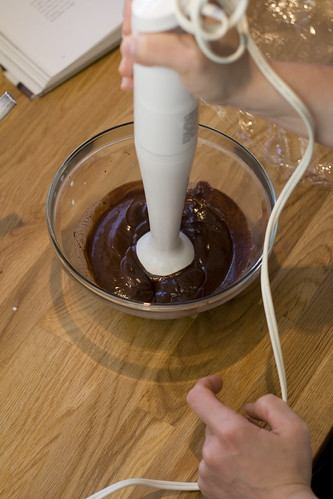
Heat the cream until it's the temperature of warm bath water about 105 degrees F. In a heat proof bowl over a pan of simmering water (or in the microwave) melt the chocolate so it is the same temperature as the cream. It's important that neither get too warm or the ganache can easily separate. It's important, though, that the chocolate is completely melted or there will be little bit of hard chocolate throughout the truffle base. Once the chocolate is melted add it to the cream and stir using a rubber spatula by making small circles in the middle of the bowl. Keep stirring that way until you see a glossy ring of chocolate appear- this is the beginning of the emulsification. After the chocolate is completely dark and glossy, add in the VERY soft butter (if using) and as soon as that is mixed in, pour into a small container lined with plastic wrap (makes it easy to remove the next day to scoop. Don' t stir after the chocolate is in the container, leave it alone to set up. Alternative to stirring you can see in the picture I am using my immersion (hand blender) to mix the chocolate and cream together. This creates a beautiful ganache and is worth going out to purchase one for that reason alone (but there are also MANY other reasons to have one as well!). Once the chocolate is poured into the cream, place the blender so the bottom is flat on the bottom of the bowl and leave it in place and blend. If you move it around a lot you can incorporate too much air into your ganche.
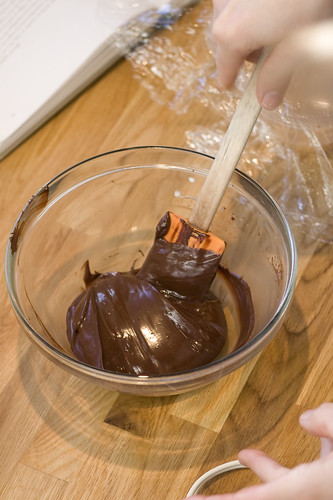
Ideally the base is allowed to sit overnight or until it is completely firm. DO NOT REFRIGERATE. The ganache won't set up as well or as evenly.
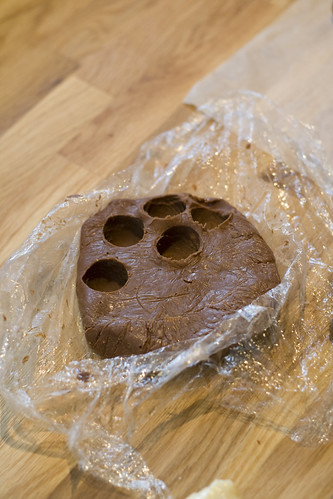
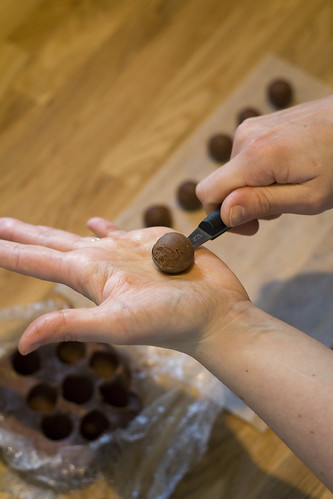
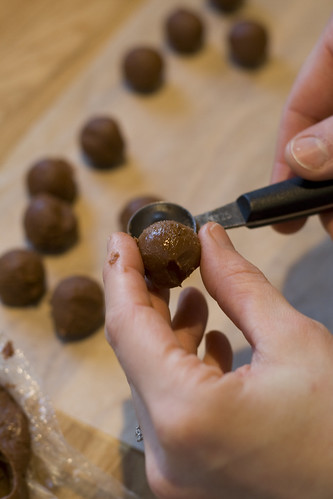
After the base has set up, lift it out of it's container and using a truffle scoop (or melon baller, or even a teaspoon) scoop round balls out of the base, and to get them to release from the scoop, rub the back on your hand to warm it up, this will melt the very outside of the ball causing it to slide right out of the scoop. Go through and scoop all the base and then roll to make the scoops as round as possible. At this point you want to give the balls of ganache time to firm up and settle, so ideally you could just leave these out on the counter, covered overnight before you dip them in chocolate. If you need them sooner, or don't want to continue, right after rolling the ganache, roll the balls in cocoa powder, finely chopped toasted coconut, or nuts or whatever else you desire. And your done! ( At this point, I would store leftover truffles in the refrigerator- without the protective coating of the tempered chocolate the truffle will spoil faster)
If you want to dip them into tempered chocolate which creates a little chocolate shell, lets the truffle last longer, and helps the outside garnish to stick better read on for further instruction!
Chocolate Tempering
There are many ways to temper chocolate, the easiest and simplest (for small amounts of chocolate) is in the microwave. Like mentioned in the beginning of the post, I'll leave explanation aside for now and just go through the how to... but if you want to know more about tempering be on the lookout for a link to the left in the upcoming months, and that will give you more information than you could wish for!
Take about 8 oz of chocolate (dark, milk or white) and place into a glass heat proof bowl and into the microwave. Heat it up for about 15 seconds (this will vary from microwave to microwave) if you don't have a microwave you could use a pan of boiling water and just keep putting it on and taking it off the water. You basically want to take briefly heat up the chocolate, stir as much as possible to slowly melt/ mash the chocolate into one mass, put it back into the microwave for a brief period of time, stir and so on until it's melted. It's important to stir as much as possible in between heating it up so that as it gets warmer and melts more you won't end up with unmelted chunks or chocolate that has gotten too hot.
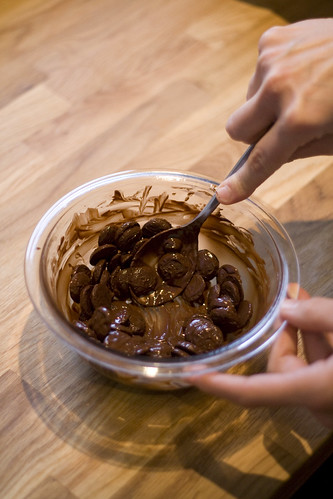
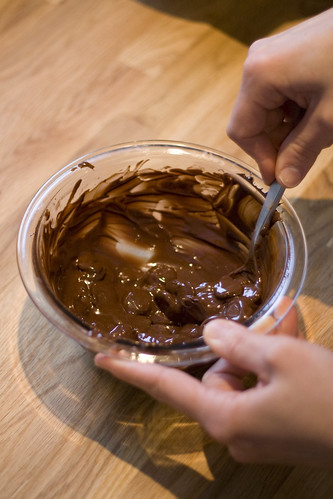
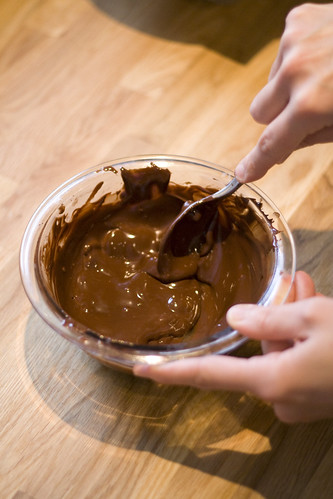
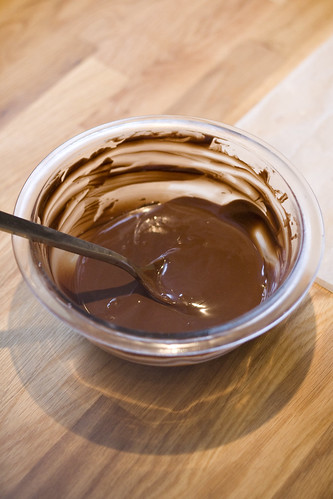
Your goal is to get this chocolate in a liquid/ fluid state before it gets past 91 degrees F. So a lot of stirring and brief heating in the microwave (and stir even if it doesn't look melted- chocolate holds it's shape even when warm and soft) will enable you to do this. Once it's melted and fluid and as long as it hasn't gotten too warm, it's tempered! If the chocolate cools off before you are done using it, heat it up again in the microwave using the same technique.
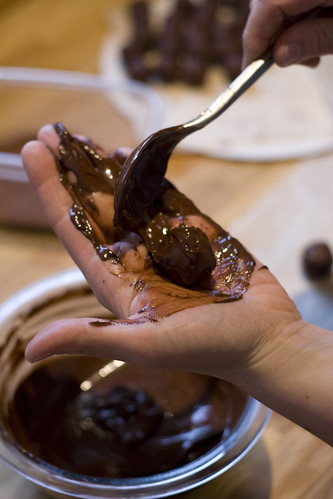
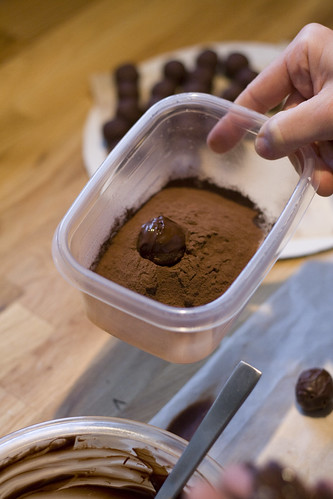
Once the chocolate is melted, take one hand, that will be designated the "chocolate hand" and drop a truffle in the chocolate, and using a spoon place that truffle into your hand and roll it a round to get rid of the excess chocolate then let it roll off your hand and on to a piece of parchment paper. Go through and dip all the truffles, scraping chocolate off you hand as needed and then dip them a second time (at this point the first coat of chocolate will have set up). Make sure before you go through the second round of dipping that you prepare the coconut, or nuts or cocoa powder (whatever you are rolling the truffles in) and put it into a medium sized bowl or container. After dipping the truffles for the second time, instead of putting them back on the parchment, put them into the container of whatever you are rolling them in. Let them sit briefly (about 30 sec) usually long enough to dip the next truffle, and then before putting the second truffle in the container of "garnish" roll the first one around in the container to coat it completely, leave it in there, place the truffle that was in your hand in the container and repeat the process all over again, and before the third truffle is placed in the container, take out the first (because the chocolate will have hardened by then). If you roll the freshly dipped truffle too soon the chocolate starts to drip off the truffle and looks messy, so by letting it sit still briefly, the chocolate will set up enough so when coated it will stay in place. By shaking the container instead of rolling it with your hand, that will also help to not disturb the chocolate while it's hardening. Because the chocolate is tempered it shouldn't take too long to set up.
Then you're done! Because the ganache has been sealed by the outside coating of tempered chocolate you can keep these out on the counter for about 1 week. As long as they are well wrapped you can also freeze them. Just make sure to let them thaw slowly in the refrigerator before returning them to room temperature.



1 comment:
Wow, what a great, and thorough post! Love your blog! Truffles look simply divine! I have never made them, and I might just attempt now. So glad you guys added me on Flickr, great recipes, and photos!
Post a Comment