Showing posts with label main dishes. Show all posts

Sunday, June 21, 2009

Macaroni and Cheese

Here is a recipe for a healthier macaroni and cheese. In the picture I used whole wheat elbows and mixed in some spinach and mushrooms, but you could easily just use regular elbows and no veggies if you so desire. I left the bread crumbs off the top due to some time constraints but I will include the topping in the recipe. This is a recipe that I got from one of the cooking light cookbooks and have modified it a bit. The addition of the cottage cheese and sour cream add lots of flavor and creaminess without making it too unhealthy.

Mac & Cheese


Baked Macaroni and Cheese (serves 6)

1 egg
1 cup low fat cottage cheese
3/4 cup low fat sour cream
1/2 cup non fat or low fat milk
2 TBS grated onion
1/2 tsp salt
1/4 tsp ground pepper
2 cups (8 oz) grated cheese- you can use all cheddar or your favorite cheese or a combination whatever you have on hand
4 cups elbow noodles cooked (8oz uncooked)
1/2 cup dry bread crumbs
2 tbs melted butter or olive oil
pinch of salt, pepper, and paprika

Pre heat the oven to 350. In a bowl mix the egg through the ground pepper until mixed. Add in the cheese and mix, then fold in the cooked noodles. Spread into a greased 2 quart casserole pan and pat down to evenly fill the pan. In a small bowl, mix the bread crumbs, butter and salt, pepper, and paprika. Sprinkle over the pasta and cover the pan with foil. Bake for 30 minutes and uncover and bake another five minutes or until the bread crumbs brown.

*Feel free to add in anything you want along with the pasta. You could fold in some ham or broccoli, or maybe some roasted poblanos and use pepper jack cheese along with the cheddar cheese.

Sunday, March 29, 2009

Ricotta Dumplings

Ricotta Dumplings


For my post I have used these ricotta dumplings in a soup, but they could easily be sauteed in some butter and topped with tomato sauce or also used as a ravioli or tortellini filling. Feel free to play around with the vegetable additions, as I would imagine a pumpkin or other squash would go really well.

Ricotta Dumplings (makes about 24 large sized dumplings)

1 lb ricotta
2 eggs
1/2 cup finely grated Parmesan (feel free to use another hard cheese)
3/4 cup finely chopped spinach, well drained (feel free to use frozen)
10 cloves of roasted garlic (about 2 tbs mashed up)*
3/4 tsp salt
1/2 tsp pepper
1/4 tsp finely chopped lemon zest
1/4 cup flour
1/4 tsp freshly grated nutmeg

* to roast garlic, you can use a whole head or just as many cloves as you need, and wrap it in foil and bake in a 375 degree oven for approximately 40 minutes to an hour until very soft when touched. Either squeeze out the garlic from the skin or you can also peel the cloves to ensure maximum yield.

For the dumplings, mix everything together in a bowl. This can be made in advance before cooking, or once the dumplings are cooked you can hold them overnight in a covered container. To cook the dumplings, bring a large pot of salted water to a boil and drop desired sized dumplings into the water and turn the water down to a simmer for 5 minutes. Make sure when forming dumplings (usually by using two spoons or a small scoop) that they are fairly tightly compact, because with the addition of the spinach the dumplings can fall apart if too loosely formed. Only cook about 6-10 dumplings at a time, so you don't crowd the pot. When done, using a slotted spoon, transfer dumplings to a bowl or plate. Bring the water back to a simmer, add the next batch of dumplings. I have put these into a chicken soup but you could also just saute them over high heat with a little butter or use as a filling for ravioli. If using in soup, I would keep them separate until serving, as storing the dumplings in the soup will probably make them begin to break down.

Sunday, January 25, 2009

Tamale Corn Bake

Tamale Corn Bake


I wasn't quite sure what to call this, incidently this has a lot of the same ingredients as my corn casserole, so fans of that, be sure to try this! I hate to have to use mixes, but I gave up (at least for now) trying to replace using a cornbread mix in the corn casserole, because I couldn't get come up with anything close enough to the casserole made with the mix. Unfortunately for now, this dish also uses the mix (although maybe for most, that's a good thing, as it certainly speeds things along). My husband couldn't believe his eyes when he saw me buying cornbread mix!

It's a simple casserole that I originally saw in Cooking Light and I have made a few changes to it. The 
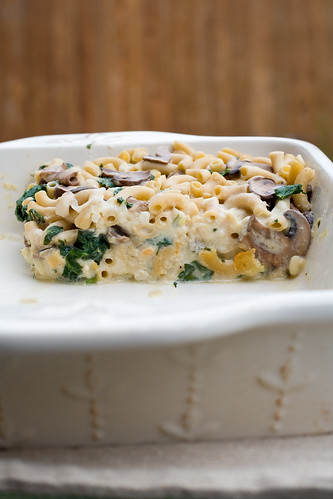
original uses just chicken on top of the casserole but when I first made this I had a whole bunch of root veggies to use up so I roasted them and scattered them on the bottom. I'm always looking for creative ways to sneak in some more veggies! This can easily be made with out any chicken either- the picture above is a version with just veggies inside and no chicken on top. I have made it both ways. You could also experiment with including other veggies or using some pork or turkey perhaps.

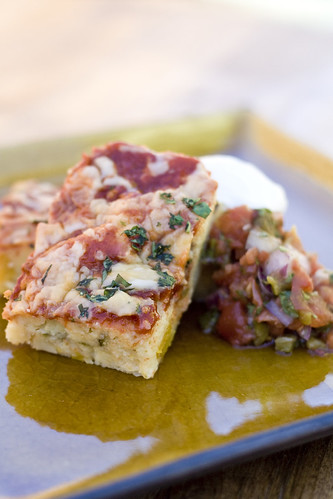
Tamale Corn Bake (serves 6-8 as a main dish)

1 cup (4 oz) grated cheese (cheddar, monteray jack, pepper jack, or a blend- whatever
you like)
1/3 cup fat free milk (or what ever you have on hand)
2 egg whites (or 1/4 cup egg substitute)
1 tsp ground cumin
14 3/4 oz can cream style corn
8.5 oz of corn muffin mix (look for one lower in fat and no hydrogenated oil!)*
1 4 oz can chopped green chiles (or you can roast some fresh anaheims or poblanos)
1 10 oz can (1 1/4 cup) enchilada sauce
2 cups shredded cooked chicken breast
2 cups roasted vegetables- Optional (I used parsnips, carrot, sweet potato and squash you could use only one of them or a few)

For garnish: sour cream, cilantro, salsa

Pre heat the oven 400.
In a medium bowl combine the cornbread mix, 1/4 cup of cheese and cumin, mix until evenly distributed. In a separate bowl mix the egg, milk, creamed corn and chiles. Add to the cornbread mix and stir to combine. Grease a 13x9" baking dish and if using veggies, I like scatter them on the bottom, then pour on the cornbread mixture. Bake for 20-30 minutes until it is fairly baked through (should feel firm and bounce back when pressed, but the middle should still be a little soft). Then take the dish out of the oven, poke it all over with a fork and pour on 1/2 the enchilada sauce, scatter the chicken, then pour on the rest of the sauce and then sprinkle on the cheese. Bake for 15 more minutes. Take it out of the oven and let it sit for 5 minutes before serving. Garnish with some sour cream and chopped cilantro and salsa if you wish.

*one of these days I'll come up with a recipe for a suitable corn bread mix to use in this and the corn casserole.

Sunday, January 18, 2009

Chicken with Okra and Sweet Potatoes

_MG_0021-Edit


Here is a simple hearty stew that can easily be adapted to your tastes and is a perfect dish to warm you up on cold winter nights.

Chicken with Okra and Sweet Potatoes
Serves 4

4 chicken thighs*
salt and pepper
1 TBS oil(vegetable)
1 medium sized onion
3 cloves garlic
1/2 cup white wine (or you can use chicken stock, or water)
3/4 tsp cayenne (optional- if you like things spicy)
1/2 cup peanut butter (whatever kind you have around, preferably natural)
1 14.5oz can chopped tomatoes pureed to smooth (or you can just use tomato puree- not sauce)
4 TBS water
4 TBS tomato paste
1 TBS soy sauce
14.5 oz or 1 3/4 cup chicken stock*
2 medium sweet potatoes peeled and chopped into 1/2 inch pieces
8 oz frozen okra chopped (or fresh okra chopped into 1/4 in slices)

*You can substitute the chicken thighs for boneless chicken thighs cut into bite size pieces, or chicken legs, or chicken breasts, or go completely vegetarian and substitute tofu or just use vegetables, adding cauliflower and green beans or whatever vegetable you prefer. You can also substitute any chicken stock for vegetable stock.

Sprinkle the chicken thighs with salt and pepper. Heat the oil in a large saute pan (that has a lid) or soup pot. Add the chicken thighs, skin side down (or you can take the skin off before browning the chicken), brown until golden, flip over and brown the other side. Transfer the chicken to a plate or bowl. Add the onion and garlic and saute for 2 minutes or so to begin to soften. Add the wine (or water or stock) to loosen all the browned bits on the pan. Cook onion until softened and then add the cayenne (if using) and the water, tomato paste, tomato puree, peanut butter, soy sauce and chicken stock. Stir to combine, don't worry if the sauce looks broken or chunky, it will come together more as it continues to cook. After well mixed, add the sweet potatoes and chicken thighs (if using small pieces put in after sweet potatoes are almost cooked) After everything is cooked through, add the okra** and simmer for 5 minutes.

This can be made ahead of time and reheated. Serve over rice.

**You don't want add the okra too soon or it will get overcooked, unless fresh okra is used. If using fresh okra then you would add it when sweet potatoes are still a little crunchy so the okra has time to cook until tender.)

Friday, March 21, 2008

Comfort food made healthier


It seems to be a constant struggle, how do you make the foods you loved as a kid and the foods you indulge in, healthier? My philosophy is to cut back on the fat where you can, but to also try to fit more vegetables into the dish to bulk it up and cut back on the fat per serving. The other way I look at it is, always trying to make foods that somehow contribute to your daily servings of fiber, vegetables, protein, whatever it may be, make it count- no empty calories. Granted there will be some here and there, but I believe if you take this approach daily, you can still eat foods you enjoy but create a healthier diet for yourself. This dish would be a classic example. The sloppy joes are loaded with veggies and the bun has whole wheat flour and lot's of flaxseed. I used ground flax and found that it created a really nice and chewy texture in the bread.

Sloppy Joes (serves about 6)

1 lb lean ground beef (or turkey, chicken or even crumbled tofu)
1 medium onion diced
1 green bell pepper diced
2 medium cloves of garlic finely chopped
2 cups grated butternut squash (either using a cheese grater or food processor)
1 1/4 cups tomato juice (this is flexible- tomato puree or v-8 or reg tomato juice)
1 cup BBQ sauce
1 TBS Worcestershire
1 TBS brown sugar

Brown the meat in a large saute pan. Cook through and set aside to drain on a paper towel. Drain all of the fat except about 1 TBS(if your meat is very lean you may have to add some oil. Saute all of your vegetables and garlic just beginning to get tender. Add the tomato juice and cook down until it has reduced by about half then add the BBQ sauce, brown sugar, and Worcestershire) and cook until for about 15 minutes and then add the beef back in. You want to make sure you cook it until the sauce is fairly thick adding the ground beef towards the end. This freezes well.

Flax Seed Rolls or Hamburger Buns (Makes 12 medium size rolls)

8 oz all purpose flour
10 oz whole wheat flour
2.5 oz rye flour
2 oz flax seed (about 1/2 cup)
1 1/4 tsp instant yeast
2 TBS honey
14.6 oz water
2 tsp salt

Mix all the dough except the salt. Mix until all the flour has been mixed in but don't start kneeding the dough yet. Cover and let this sit for twenty minutes. After the 20 minutes are up mix in the salt. This gives the yeast a head start and gets it working it also gives the flour a chance to absorb all the liquid, making it a lot easier to handle. Sprinkle the salt on top and either by hand or machine, mix for 5 minutes or so, until the dough is smooth and elastic. Put the dough in a greased bowl, cover and let it rise until double (in a warm place) this will take about 1 hour assuming the room is 70 degrees or so (if it's colder it will just take longer. Gently deflate the dough and let it double again (this should only take about 20 minutes or so). **Alternatively you can mix the dough and then just put covered bowl in the refrigerator overnight and let it proof slowly. The next day take it out and let it sit at room temperature for a few hours to give the dough a chance to warm up and then continue as normal** After the dough has doubled for the second time turn it out onto a very lightly floured surface and divide the dough into 3 oz portions (you can eyeball this or weigh it) and you should have about 12 buns. Roll them into a rough round and let them sit for 20 minutes covered. Meanwhile turn the oven on to 375 and prepare a pan with either parchment or grease. Crack 1 egg into a bowl, add a pinch of salt and 1 tbs water and stir until the egg is completely broken up. After the twenty minutes re-round the balls making sure you they are smooth all over. Place them on the sheet pan and take your hand and flatten each ball as much as possible (this will create a wider surface and more of a bun shape) let them rise in a warm place covered until they have doubled in size. This should take anywhere from 1/2 hour to an hour. After they are fully proofed brush some egg wash on each bun and press down gently again to help to flatten them (they bounce back quite a bit). Bake at 375 until a dark golden crust forms. Probably about 1/2 an hour. Let them cool completely before cutting in half. These freeze well.

Friday, February 1, 2008

The Perfect Crust

Our winter inspired white pizza fresh from the oven

Pizza has become a weekly occurrence in our house and slowly over time I have revised my recipe, to what I finally consider the perfect crust. It gets nice and crispy but still is a little chewy and full of flavor. It's hard to make a whole wheat crust that's not dense and flat. I guess it's not just the recipe that has been revised, but also the cooking technique to achieve the perfect pizza. I realize this recipe may not be user friendly to some given the weight measurements instead of cups and teaspoons. Next time I make my crust I will try to remember to measure it out for you. But I would also recommend that if you don't have a kitchen scale already, to invest in one, if you cook a lot. Its very handy and makes measuring out this crust so easy.... everything goes right into one bowl so you can put the bowl on the scale and keep taring it to zero with each new ingredient (or do the math). Using a scale is not only more accurate, but also takes a lot less brain power and usually prevents measuring errors. I am also pretty sure that not everyone has durum (semolina flour), or vital wheat gluten hanging out in their cabinets but you can work around that if you don't want to buy it. The vital wheat gluten is added to help with the addition of the whole wheat flour (to develop more gluten). The durum helps make the crust a little chewier. You can par this down to a more basic recipe using 300 grams of flour (all white bread flour if you wish) and leave out the durum and vital wheat gluten.

Ready to put into the oven


Pizza Crust

150 g whole wheat flour
100 g bread flour
50 g durum
2 g instant yeast
6 g salt
190 g water
6 g oil
9 g honey
1 tbs vital wheat gluten


You can scale everything into one bowl, starting with your dry ingredients. If using active dry yeast you will need to bloom it in the water ( warm it up first) and then mix everything else in. Mix the dough either using a mixer or by hand until all the ingredients have been completely incorporated. I find my hand to be the most efficient tool. After you get everything mixed let the dough sit about 5 minutes to let the liquid hydrate the flour. Then you want to knead the dough until it is smooth and elastic. If it looks like the dough is getting too tight, let it rest for five minutes (giving the gluten a chance to relax) and then go back to it. The dough will be more supple and easier to knead. Place the dough in a greased bowl and cover it and let it double. For maximum flavor it's best to let is sit overnight in the refrigerator, and it can sit for up to three days*. Pull it out of the refrigerator about 2 hours (depending on how warm the room is) before using it, to give the dough a chance to warm up. While it is warming up you can prepare your toppings- usually when I make my pizza's I will put a thin layer of sauce and then I like to put dollops of ricotta cheese before putting my toppings down and then finishing with a sprinkle of cheese. I don't like a pizza that's over loaded with cheese (we try to keep it on the healthy side) so that's why we put the ricotta on the bottom to give that creamy effect and then a sprinkling of cheese on top maximizes it's flavor. This pizza I have posted is a winter inspired pizza with no sauce ( a thin layer of garlic infused hazelnut oil takes it's place), ricotta, roasted cauliflower, caramelized onions, pears and smoked blue cheese which was awesome!
The key to a successful pizza, is baking in a hot oven directly on a hot pizza stone. I turn my oven up to 500 degrees (but this may be too hot for different ovens I think ours runs a little cool it will be slight trial and error) with the pizza stone already in the oven.
Now with the oven and stone heating, and the dough at room temp, toppings ready, it's time to build the pizza. Depending on how thick you like your crust will depend on this next step. You can use a small amount of flour if you find your dough sticking.
For a thicker crust the best way is to gently start stretching the dough out. This takes some practice to not stretch the dough too thin in places you can cheat by starting with a rolling pin and then from there you want hold the dough on one end and let it hang in the air (so gravity can help) and slowly rotate the dough so you work your way around the entire edge. This dough will make about a 15 inch pizza. So by the time you're done, what you want is for the edges to be a little thicker than the center. If the dough is too thick underneath the toppings, it won't get crispy enough.
For a thinner crust you can just keep using the rolling pin and keep everything the same thickness, rolling the dough out to about 1/4 inch.
Now that the dough is rolled out your going to need a piece of parchment paper (NOT wax paper, this is going in the oven) a little bigger than the size of the dough, and you will need another flat sheet pan and a little bit of semolina or cornmeal. If the sheet pan has sides turn it over so you are using the back. Sprinkle some of the cornmeal on the sheet pan (this is going to make sure the parchment slides right off the pan) and then place the parchment on top and sprinkle some more cornmeal (so the dough doesn't stick to the parchment). Place the dough onto the parchment and smooth it out so it's fully stretched out. (This is where it gets tricky- you need to make sure the dough is the size of the sheet pan so it doesn't hang over the edge. After the dough is on the parchment, build your pizza and then pick up the pan and give it a slight shake to make sure the parchment will slide off the pan. Open the door and put the pan in the oven and angle the back down close to the stone. This should cause the pizza to slide as well. In one sweeping motion you want to gently push the pizza to the edge so it's almost touching the stone and as you lower it down, pull the sheet pan quickly away. What you should end up with is the pizza nice and flat on the pizza stone! (this move can take a little practice) From there the pizza usually takes about 10 minutes to bake (depending on the temperature). You want to make sure you see that the crust is a dark golden brown (don't be afraid of some color) and that the cheese is bubbling and is taking on a little color, this will assure that the bottom is also cooked. If you pull it out too soon , the top may look nice and done but the bottom will be soft and not hold up well. To remove from the oven the easiest way is to pull on the parchment and slide the pizza back onto the sheet pan you used to put it in the oven. That way you don't have to deal with taking the hot stone out of the oven. Good luck, let me know how it goes! (or if you have any questions)


*You also have the option of freezing the dough at this point. To do that, you want to gently deflate the dough and then, to freeze it, wrap the dough well and immediately place in the freezer. To use after frozen, let it thaw completely (either in the refrigerator overnight or at room temp for a few hours) and continue as normal.