Sunday, June 27, 2010

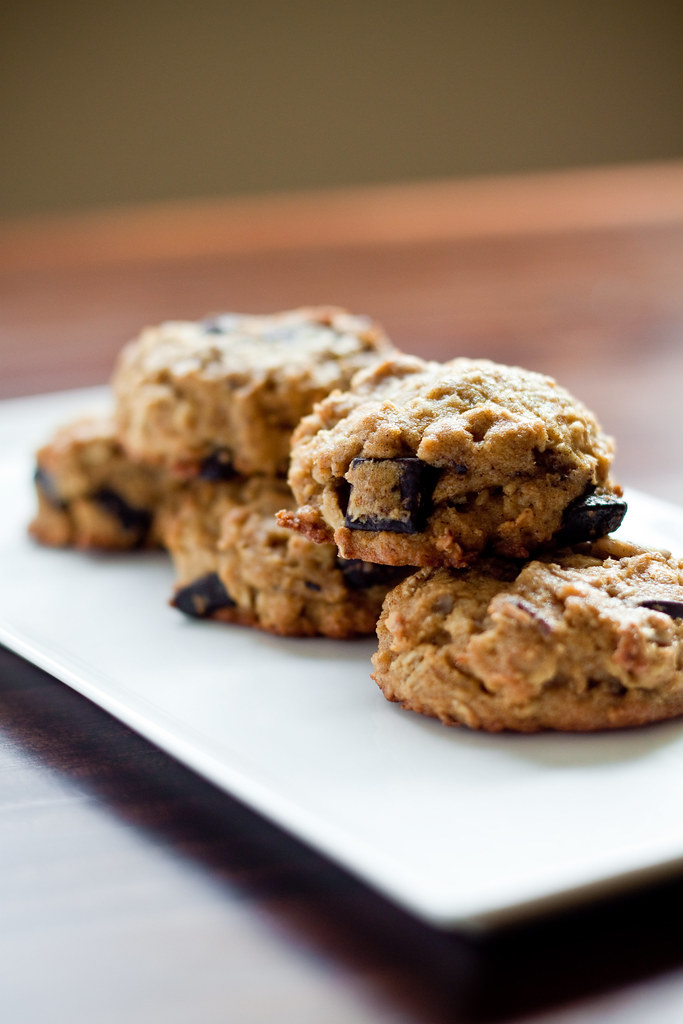
Vanilla Malt Cookies

Vanilla Malt Cookies


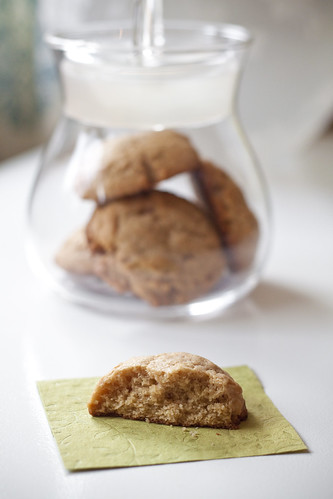
I love cookies, but my preference is usually that they have some chocolate of some sort in them. These cookies are completely chocolate free, and are some of my favorite. They are extremely addicting and go perfectly with coffee! Malted milk powder if you have never had it, adds a great milky carmel flavor. My favorite brand is Carnation, if you can find it (usually in the isle at the grocery store with the coffee and tea). The vanilla bean is optional but I've tried these cookies without them and it does add some very distinct flavor, but I would imagine vanilla paste would also work. I've also tried these cookies with whole wheat pastry flour but that also does change the flavor of the cookies and they taste more like graham crackers (not bad just a different flavor)...

Vanilla Malt Cookies (adapted from a Martha Stewart recipe) - makes approximately 36 2" cookies

2 1/2 cups flour
3/4 cups malted milk powder
1 1/2 tsp baking powder
1/2 tsp salt
3/4 cup butter (room temperature)
3 oz cream cheese (room temperature)
1 cup white sugar
2 TBS corn syrup
1 egg (room temperature)
seeds from 1/2 a vanilla bean (optional)
1 tsp vanilla

Cream butter and cream cheese with the sugar until light and fluffy. Add the corn syrup, once mixed add the egg and vanilla. In a separate bowl mix together the flour, malted milk powder, salt, and baking powder. Add to the butter mixture and mix together. Scoop the dough onto greased sheet pans (or lined with parchment paper) and press down slightly. At this point you can either freeze to bake later (always my preference so you always have fresh cookies or bake right away. Bake 375 for 12-15 minutes. If you decide to freeze the dough, scoop the dough on a sheet pan and let it freeze solid and then put the dough into a zip lock bag. When ready to bake just simply put them on a sheet pan and into the oven- no defrosting necessary, the cookies bake better though if you press the freshly scooped dough down before freezing (you only need to slightly press the dough down otherwise the cookies will end up too flat).

Tuesday, May 25, 2010

Tomato and Lentil Stew

Tomato & Lentil Stew


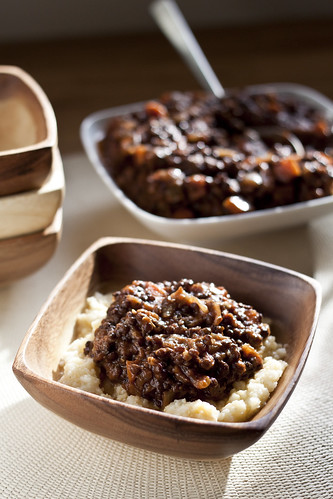
It's almost June and our heat is still on!!! This makes for a satisfying and healthy lunch or dinner. It can easily be made by pantry staples and it gets better as it sits overnight. I slightly modified a recipe from Ina Garten- although it didn't need much modification! I haven't given up on my blog, but being a working mommy keeps me very very busy! Summer is such a great season for food and I will be sure to honor it with more frequent blog posts. Enjoy, and may your weather be too warm for this recipe!

Stewed Tomatoes and Lentils from Barefoot Contessa At Home

2 tsp olive oil
2 onions diced
2 carrots diced
1 TBS minced garlic
1 28 oz can crushed tomatoes (briefly pulse in the food processor)
1 cup french lentils (very small lentils, regular brown lentils can be substituted but the french lentils are worth seeking out.)
2 cups chicken stock
1 tsp curry powder
2 tsp thyme
1 tsp summer savory
2 tsp salt
1/4 tsp ground black pepper
1 TBS red wine vinegar

Saute the onions and carrots in the olive oil over medium heat and cook the vegetables until they begin to caramelize. Add the garlic about a minute before the vegetables are done. Add in the tomatoes, lentils, stock, curry powder, thyme, and summer savory. Simmer over low heat for 40 minutes or until the lentils are tender. Add some more chicken stock or water if the mixture seems too thick. Season with salt, pepper and vinegar. The combination of the tomatoes and lentils paired really well with polenta.

Saturday, April 17, 2010

Hoisin ginger dipping sauce, dressing, and marinade

Hoisin Ginger Sauce

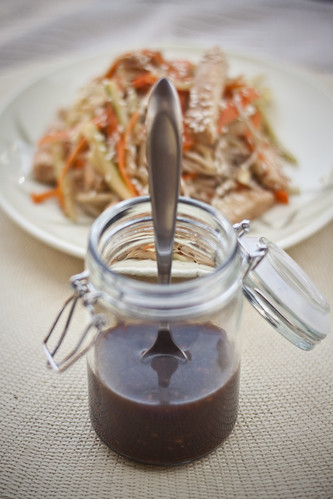
I struggled with what to call this. I modified a recipe I found in Vegetarian Cooking for Everyone by Deborah Madison and the recipe was labeled "Marinated Tofu". I didn't use it with tofu,so that wasn't going to work for a recipe title but used it for almost everything else! It worked great for dipping sauce for salad rolls and pot stickers. I also used it with buckwheat noodles for a cold veggie and noodle salad. I also used it as kind of a marinade with some steamed chicken (tossed the cooked chicken in the sauce which it soaked up...). If I had any left it could have easily also been used for a stir fry sauce. It's versatile, fast and keeps for a while! What more could you ask from a recipe?

Hoisin Ginger Sauce (approximately 2 cups)

1/3 cup hoisin
2 tsp dark sesame oil
1/3 cup mirin
3 TBS soy sauce
2 TBS rice wine vinegar
1 1/2 TBS brown sugar
1 1/2 TBS tomato paste
3 cloves garlic minced
1 TBS minced ginger

All you have to do is put it all in a bowl and mix! I've kept it for two weeks with no problems (in the refrigerator)

Tuesday, March 30, 2010

Pumpkin Apple Soup

Pumpkin Apple Soup


It seems I'm always off season with my pumpkin posts :). The problem is I go crazy when they are in season and I roast and puree lot's of pumpkin to use through out the year, thus the off season posts (be on the look out for some pumpkin scones). I was also very pregnant when pumpkins were in season this year and was not up to posting...
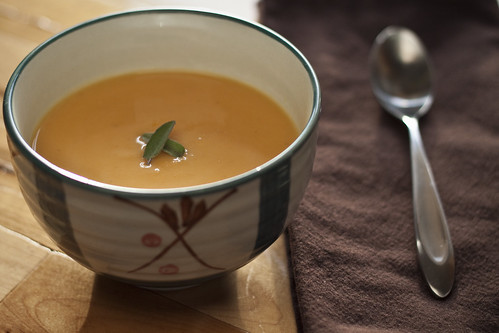
If you don't happen to have fresh pumpkin puree in your freezer I would substitute with some other squash puree like butternut or kabocha squash. With such a simple soup, canned pumpkin won't do this soup justice (but can be used, especially in a hurry). To roast the squash, cut it in half and scoop out the seeds. Put the squash cut side down in a pan with a little water in the bottom of the pan, cover with foil and bake at 350 until tender. Let it cool and scrape out the squash. Measure out three cups and if you have any left over you can always freeze it for later.

Pumpkin Apple Soup

3 cups pumpkin or squash puree
2 tbs olive oil
1 cup chopped onion
2 medium sized carrots peeled and roughly chopped
1 medium apple peeled and chopped (any flavorful cooking apple)
1/2 tsp red thai curry paste*
28 oz chicken stock (or vegetable stock)
2 bay leaves
1/3 cup 1/2 and 1/2
3 TBS sherry
1 tsp salt (more to taste)
1/4 tsp pepper

*optional, provides a nice hint of spice

In a large pot, saute the onion, carrots, and apple in olive oil and add salt and pepper. When the carrots are soft and the onions are translucent add the thai curry paste, cook for one minute (if using) then add the stock, squash, and bay leaves and bring up to a boil. Once the soup is boiling, (make sure carrots and apple are very soft, simmer longer if needed) turn off the heat and add the 1/2 and 1/2 and sherry. Puree in a blender until smooth. Check for seasoning adding more salt and pepper if necessary. A nice garnish is toasted pumpkin seeds and sauteed apple (or just pumpkin seeds).

This soup freezes well.

Monday, March 22, 2010

Cheesecake

Cheesecake


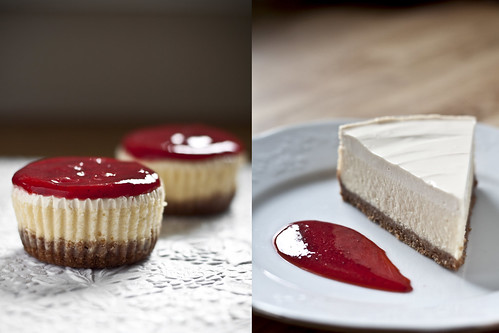
I was never a huge cheesecake fan... if given the choice of cheesecake or something else I would usually pick the something else. That was until I had met my husband, who is a huge cheesecake fan and would always pick cheesecake over anything else. I discovered this recipe, which is called Three Cities of Spain cheesecake (from Three Cities of Spain coffeehouse in New Mexico that closed in the 70's) and it converted me into a cheesecake fan! What sets this cheesecake apart is after it's baked it gets a thin layer of lightly sweetened sour cream on top, and briefly baked in the oven to set it. The addition of the sour cream helps to balance the sweetness of the cheesecake. I also prefer to use cinnamon sugar graham crackers, or add some cinnamon to a regular graham crackers crust, for an extra dimension of flavor.

Three Cities of Spain Cheesecake

Crust:
5 oz (1 1/2 cups) graham crackers finely crushed- you can also use gingersnaps, chocolate cookies, vanilla wafers
1/3 cup of sugar (you can adjust the amount or leave it out completely if using cookies that are fairly sweet)
5 TBS melted butter
1/8 tsp of salt
1 tsp of cinnamon (optional, but if using regular graham crackers I highly recommend it!)

Mix everything together in a small bowl and press into the bottom of a 8" or 9" greased springform pan (if you use a 8" pan the cake will be a little higher).

Pre heat the oven to 350 degrees. Place the crust in the oven for 5 minutes, long enough to dry out the crust. Once the pan is cool, wrap the outside in plastic wrap and then a layer of foil, using the top of the pan to help hold up the plastic and foil, make sure all the plastic is tucked inside the foil. Set aside and turn the oven down to 300 degrees.

Filling:
24 oz of SOFTENED cream cheese
4 lg room temperature eggs
1 cup of sugar
1 tsp vanilla

Topping:
16 oz sour cream
2 TBS brown sugar
1 tsp vanilla

It is very important that the cream cheese is softened so you don't end up with lumps. I like to use a mixer to mix the filling, but this could easily be done by hand as well. It is important that the sugar and cream cheese is creamed together really well so there aren't little lumps of cream cheese left. Once you start adding eggs it is important to not over mix or incorporate too much air (so the filling remains dense and creamy).

Cream together the cream cheese and sugar on medium speed, scrape down continually to make sure everything is evenly mixed. Turn the mixer down to low and add the eggs one at a time, making sure to stop and scrape after each addition. Add the next egg only after the previous one is completely mixed in. Add in the vanilla and any other desired flavors at the end. Pour into the par baked crust and put pan into a larger pan and fill it with hot water that goes 1/2 way up the sides of the pan. Bake for approximately 45 minutes. Mix the topping while the cheesecake bakes and set aside until the cheesecake is done. To test the cheesecake for doneness, gently tap the pan (the actual cheesecake, if you tap the outside pan it will make the water slosh and possibly go up into the cheesecake) and if you see it wiggle all together then it's done (as opposed to sending a ripple through the batter). After the cheesecake is done, let it sit for 10 minutes and then carefully spread the sour cream topping evenly over the top. Put it back into the oven for 10 minutes. Pull it out, let the cheesecake cool and then once it's room temperature, put it into the refrigerator and let it cool completely. Unmold and cut with a hot clean knife...
Fresh strawberries or strawberry puree make a wonderful accompaniment!

Baking options- I recently tried two other ways to bake cheesecake:

Cupcakes: Use paper liners, and press some of the crust into the bottom and par bake the same way. You don't need a hot water bath and the cooking time will be dramatically reduced (check after 20 minutes). Once the cheesecake is done, take it out of the oven and put the sour cream topping on and return it to the oven for 5 minutes. You can either leave the papers on (if letting people serve them selves, it might be easier) or you can peel the paper off before serving. It helps if the cheesecake is completely cool and thoroughly chilled.

In the pressure cooker!
Follow the directions as stated in the recipe above, but you don't need to wrap the outside with plastic and foil, instead raise it off the bottom of the pressure cooker and put 2 cups of water in the bottom, and then cover the top of the pan instead with foil. Once the pressure has been reached in the pan, cook for 25 minutes (cooking time will vary from brand to brand), take it out, and spread the sour cream on top and bake in the oven for 10 minutes at 350 (make sure to leave the oven on after par baking the crust) and you're done! I like that I don't have to mess around with the water bath and the cheesecake turned out wonderfully creamy and perfectly cooked!

Thursday, March 11, 2010

Granola

Granola


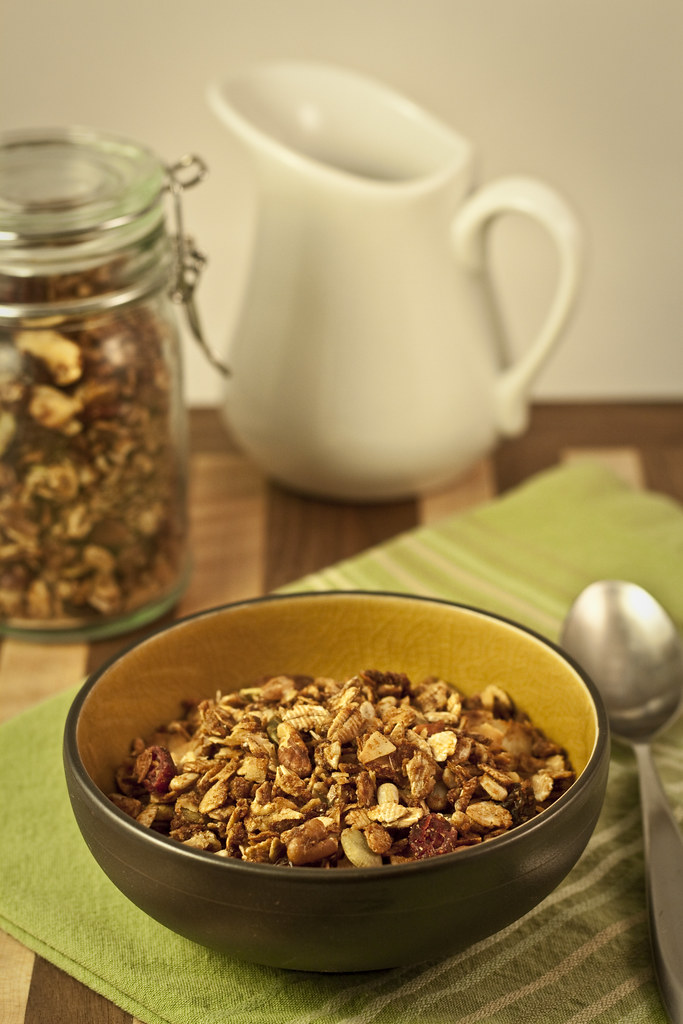
Granola can be made from so many different things, you can use different kinds of flakes (not just oats) including barley flakes, triticale flakes (both of which are in the picture). It can be made with or without coconut, it can have a number of different nuts or seeds, or none at all. There are many different dried fruits that can be added, or left out completely. The point is you can make granola how you like it, don't feel too confined by the recipe given here. The oats, nuts, coconut, fruit are all considered "garnish" and can be substituted for whatever you want... only like oats and nothing else? Substitute everything else for oats. Only like nuts and oats but nothing else? Leave the rest out and increase the amount of nuts and oats... all you have to do is add up the amount of total garnish (except the dried fruit which is added after cooking) and divide up however you desire. The total amount of garnish is 10 cups.

Granola (makes approximately 13 cups)

4 cups rolled oats
1/2 cup nonfat dried milk
1/2 cup wheat germ
2 cups unsweetened large flake coconut
1 cup chopped or slivered almonds
1 cup sunflower seeds
1/2 cup pumpkin seeds
1 cup chopped pecans
6 TBS honey
6 TBS maple syrup
1 TBS cinnamon
1 tsp nutmeg
2 tsp vanilla
1/4 cup brown sugar (I used a coconut palm sugar instead)
1/4 cup melted butter
1 cup raisins
1 cup cranberries

Pre Heat the oven to 300 degrees Fahrenheit. In a large bowl mix together the honey, maple syrup, cinnamon, nutmeg, vanilla, brown sugar and butter. Once it is well mixed, stir in everything else but the dried fruit (if the dried fruit is baked it will become too hard). Once everything is well mixed and coated, spread the granola out on 2 large baking sheets and put into the oven. Stir every 10 minutes making sure to that everything cooks evenly. It will take approximately 30-40 minutes. The granola is done when it is a golden brown. Take the mix out and let cool on the sheet pan. Once everything is cool, mix in the dried fruit and store in an air tight container to prevent the granola from getting stale.

Friday, February 19, 2010

Crunchy Coconut Cookies

Coconut Cookies


Be careful, these are addicting! This is another great cookie to use whole wheat flour in it, the flavor and texture nicely compliments the coconut. This dough can also be used for a variety of cookies. In the picture they are just plain drop cookies, but the dough is also perfect for little sandwiches with a chocolate ganache filling or maybe passion fruit curd? They could also be rolled and cut out into various shapes and decorated- they would make a great Easter cookie.

Coconut Cookies

1 cup butter
1 1/2 cups powdered sugar sifted
1 egg
2 tsp vanilla
2 1/2 cups whole wheat pastry flour (or All Purpose Flour)
1 tsp baking soda
1/2 tsp cream of tartar
1/2 tsp salt
1/2 tsp freshly grated nutmeg
1 1/2 cup unsweetened coconut

Preheat the oven to 375 degrees Fahrenheit. Cream the butter and sugar together until all the powdered sugar is mixed in (be careful, too much creaming and the cookies will spread too much- a bad thing if you are rolling the dough out). Add the egg and vanilla and cream until creamy and smooth. Mix all the dry ingredients together and mix into the butter. This dough can be scooped, it can be formed into logs and sliced or it can be rolled out and cut (will keep it's shape). If you decide to roll the cookies refrigerate the dough in a 1" thick disk before trying to roll out. You can also freeze the dough after formed to bake later

Bake at 375 for approximately 8-15 minutes (depending on how thick/big they are).

Tuesday, February 9, 2010

Baked Apple Pancake

Baked Apple Pancake


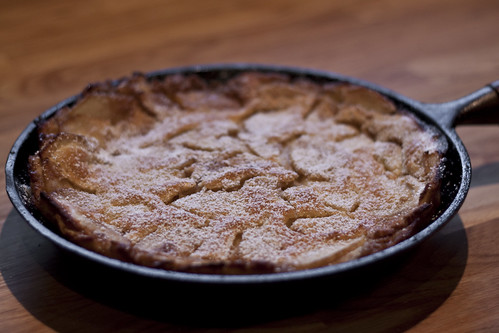
This baked apple pancake is a great alternative to the standard breakfast options- pancakes, waffles, french toast. It's quick and easy and can easily serve quite a few with little effort and maybe more importantly all at once! This could also be served as a dessert paired with some ice cream or maybe whipped cream. While the leftovers are good to snack on you want to make sure to serve this right away. The batter portion could be made ahead of time though. This is a variation on what's called a Dutch Baby which is basically the same thing only baked without the fruit. I have used a raw cane sugar for some added interest but you can easily substitute in brown sugar or even white sugar. I also used whole wheat pastry flour with great results but you can also easily use all purpose white flour if you prefer.

Baked Apple Pancake serves 6 (adapted from Sunset Magazine)

3 Tbs butter
1/4 cup raw cane sugar (turbinado)- you can substitute light brown sugar
1/8 tsp cinnamon
1 large baking apple peeled and sliced into 1/4 inch slices
3 large eggs
1/4 tsp salt
1/2 cup whole wheat pastry flour- you can substitute all purpose white flour
1/2 cup milk (non-fat works fine, but a higher fat milk would make a richer pancake)

Pre heat the oven to 425 degrees F. In a blender mix the eggs, salt, flour and milk on high until uniform. Set that aside while you cook the apples. You will need an 10-12" oven proof skillet, preferably cast iron. Heat the pan over medium heat and add the butter and sugar. Let them melt and add in the apples and cinnamon and cook them over a medium heat until they are tender but not mushy. After the apples are ready smooth them out so they are one even layer on the bottom of the pan. While the pan is still hot, pour the batter right from the blender,over the apples and immediately into the oven. This bakes for about 15 minutes or until the middle is set and firm. It will be puffed up and fall as it cools. Serve immediately. The classic garnishes for this is a spritz of lemon juice and a dusting of powdered sugar.

You could easily substitute other fruit for apples, like pears or bananas. Another variation is to leave the fruit out of the pancake making it a traditional dutch baby and saute the fruit and serve it on top after the pancake is baked. If you do that, I would still melt the butter in the pan as normal, and add the sugar into the batter mixture.

Sunday, January 24, 2010

Biscotti

Orange Chocolate Whole Wheat Biscotti


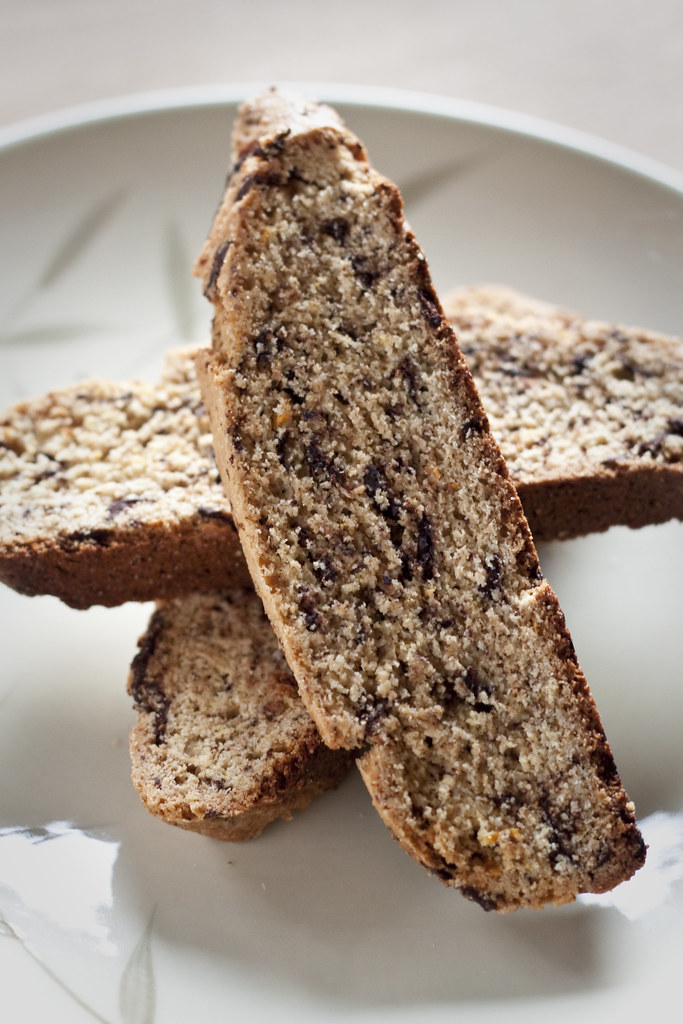
I always get asked what my favorite sweet is, and I never have a good answer because it depends on so many things. I'm never very predictable when it comes to what I like or what I want to eat, but I'm usually not one to turn down a cookie- especially a biscotti. I have posted a variation on Mark Bittmans biscotti recipe from How to Cook Everything. As with all of his recipes this is a basic biscotti recipe with ideas for variations. If you've never looked through this book, it's a great cookbook to add to your collection- it is very comprehensive and reliable with variations for almost all recipe's that allow for a lot of flexibility and creativity. I have written the basic recipe below and then I'll add a variation section with the variation I used in the picture and will come back to add to it.

Biscotti (adapted from How to Cook Everything)

4 TBS butter softened
3/4 cup sugar
2 eggs (room temperature)
1/2 tsp vanilla
2 1/4 cups all purpose flour
1 1/2 tsp baking powder
1/4 tsp salt

Variations:
Whole wheat orange chocolate: Substitute flour for whole wheat pastry flour. When creaming sugar and butter together add the zest of one orange. At the end when combining the dry ingredients with the wet add in 1 cup chopped dark chocolate.

Pre Heat oven to 375 degrees Fahrenheit. Cream together the sugar and butter until light and fluffy. Add the eggs, one at a time, and mix completely before adding the next. Then add in the vanilla. In a separate bowl, mix the flour, baking powder and salt. Add the dry ingredients to the butter mixture and mix dough until you no longer see any flour. The dough will be very stiff by now. On a greased cookie sheet (or line with parchment paper) form the dough into one long log that is about 2 inches wide. You can either make one long log or two shorter ones. Bake for about 30 minutes- until the log begins to turn a golden brown and it feels firm on top in the center of the log. Turn the oven down to 250 degrees and let the logs cool. Once they are cool enough to handle, slice on a bias(using a serrated knife), into about 1/2 inch thick slices and lay them back on the sheet pan. Bake another 15 minutes, turn them over and bake about another 15 minutes until they are dried out. They may feel slightly soft when you take them out of the oven, but as they cool they will harden.

Saturday, November 21, 2009

Apple Cake

Apple Cake


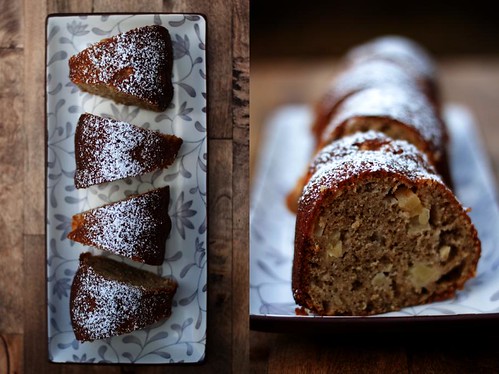
This is a simple versatile cake that could be baked in a square pan with a crumb topping or some powdered sugar on top for a morning coffee cake or dressed up for an afternoon cake with a glaze or served with some freshly whipped cream. Either way, it's easy, lower in fat and comes together quickly. This was adapted from the Bob's Red Mill Whole Grain Baking Book You could easily substitute pears for apples or add in some walnuts or pecans.

Apple Bundt Cake (serves 12)

1 cup whole wheat pastry flour or spelt flour
1 cup all purpose flour (or you can use 2 cups all purpose in place of the whole wheat pastry flour)
1/2 cup brown sugar
1/2 cup white sugar
1 tsp cinnamon
1/2 tsp allspice
1/4 tsp freshly grated nutmeg
1 1/2 tsp baking powder
1/2 tsp baking soda
1/2 tsp salt
6 TBS olive oil (or you can use melted butter or vegetable oil)
2 TBS milk
1/2 cup mashed banana
1 tsp vanilla
3 eggs
2 1/2 cups apples peeled (1 cup grated and 1 1/2 cups cut into a small dice)

Preheat the oven to 325 degrees F. Stir together all the dry ingredients (flour through salt). In a separate bowl mix together the oil, milk, banana, eggs, and vanilla. Stir together the wet and dry ingredients, adding in the apples before it is fully mixed. Mix just until everything comes together and pour into a greased and floured bundt pan and bake until the springs back when touched, or if a skewer is inserted it comes out clean with a few crumbs attached. Start checking for doneness after 30 minutes.

Wednesday, November 4, 2009

Pumpkin Chocolate Chip Cookies

Pumpkin Chocolate Chip Cookies


If you've looked thorough my previous posts you've probably have already come across this recipe. I was inspired to take a second look at this recipe after my mother in law had commented when she made them they didn't turn out like she had remembered having them when they were visiting. After thinking about it and making them again to check for measurements I decided it was probably the pumpkin. I have a small stock pile of freshly roasted sugar pumpkin in my freezer which means I never need to use canned pumpkin, but the sugar pumpkin puree has a lot more moisture which would certainly affect the texture of the cookies... So while I was making these cookies again to make sure all the measurements were correct I've made a few changes to the recipe which you can see here. These cookies are very cakey and not too high in fat so they are better eaten the day they are made or even the day after (they go really well with your morning cup of coffee). The batter can easily keep in the refrigerator for a few days and then beyond that you can scoop the dough onto a lined sheet pan and freeze the dough for later. Nothing is more handy than when you are craving some freshly baked cookies and all you have to do is go to the freezer and pull a few cookies out and 20 minutes later you have freshly cookies!

Wednesday, October 21, 2009

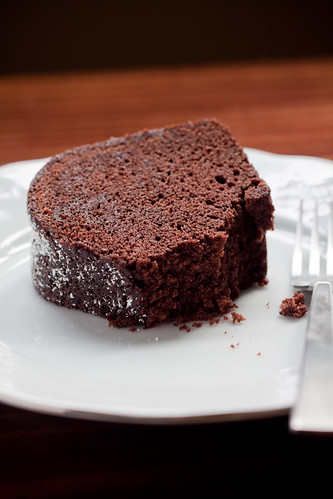
Chocolate Bundt Cake

Chocolate Bundt Cake


This is a great chocolate cake that could be used for more cakes than just a bundt cake, but it's good enough to stand on it's own, served with freshly whipped cream and fruit or lightly iced. It's dense like a pound cake but not too sweet with a great chocolate flavor.

Chocolate Bundt Cake (will serve 12-16)

8 oz (2 sticks) softened unsalted butter
2 1/2 cups sugar
2 tsp vanilla
5 large eggs at room temperature
1/2 tsp baking powder
1/2 tsp baking soda
1 tsp salt
1 cup cocoa powder
2 cups cake flour
3 TBS instant espresso powder dissolved in 1/4 cup of hot water or 5 TBS of extra strong coffee or espresso
3/4 cup buttermilk slightly warm

Pre heat the oven to 335 degrees Fahrenheit. Cream together the butter and vanilla until light and fluffy (at least 5 minutes of mixing by hand or on second speed in a mixer with a paddle attachment). Make sure to stop and scrape the bowl and paddle often. Slowly add in the eggs (and vanilla), one at a time making sure it is completely mixed in before adding the next egg. Sift together the dry ingredients and in a separate bowl mix the buttermilk and coffee. Add 1/3 of the buttermilk mixture to the butter, once mixed in, add 1/3 of the dry ingredients. Continue alternating until everything is mixed in (you will have added the dry ingredients and buttermilk in 3 additions each). Pour batter into a greased bundt (or tube)pan. Bake at 335 degrees F until done. To test for doneness press on the center of the cake (gently), it should be firm enough to bounce back or if you were to insert a skewer (or toothpick) a few moist crumbs should stick to the skewer. Once the pan is cool enough to hold, turn the cake out onto a cooling rack to finish cooling. This will be good at room temperature for a few days as long as it remains well wrapped or this cake also freezes really well.

Sunday, October 11, 2009

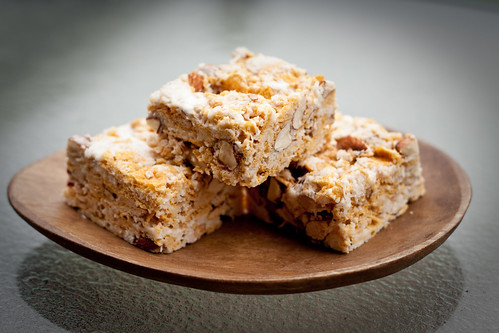
Cereal Bars

Cereal Bars


These are really just rice crispy treats with some more stuff added in. I got this idea from Martha Stewart. I made a few changes to them, but they turned out great and will definitely be made again!

Cereal Bars (makes 12-16 bars)

4 cups Cornflakes
1 cup Unsweetened co0conut (can substitute sweetened)
1 1/2 Chopped toasted almonds
16 oz Marshmallows
2 TBS butter
1 tsp Vanilla
1/4 tsp Salt

Melt butter, add marshmallows and stir until melted. Add in the vanilla, and salt and stir. Take off the heat and stir in coconut, almonds and cornflakes. Press into a greased 13x9" pan (to get thick bars I didn't use the whole pan but about 3/4 of it- you could spread it out over the whole pan, but the bars would be thicker than pictured). Let them cool (the marshmallow will set up) and cut.

Monday, August 24, 2009

Blackberry Pie

Blackberry Pie


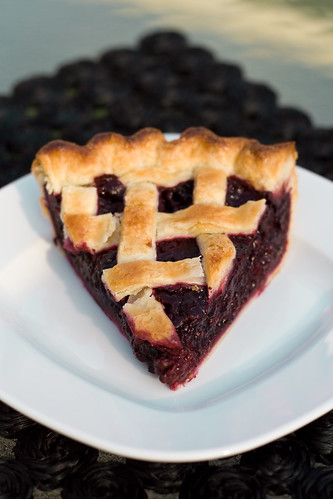
This pie can be adapted to a lot of different fruits. This uses a filling called a cooked juice filling. It works well for any fruit that is fragile and doesn't need to be cooked before being put into a pie but may give off a lot of juice as the pie bakes, namely berries. If you've ever tried to make a filling with fresh berries only to find that they released a lot of juice and made for a rather soggy pie, then this filling is perfect. It also works well for all kinds of canned or frozen fruit. It makes a gel out of liquid, sugar and cornstarch which you fold the fruit into before putting it into the pie. A different version of this method can be used for fruits that maybe be fresh and a little firmer but could benefit from some cooking before going into the pie. The fruit is lightly sauteed before creating the gel to make sure that the fruit comes out fork tender but also all the juices are appropriately thickened. The pie crust recipe is a great all purpose pie dough and the key to all great pie crusts is simple, keep everything very cold and don't overwork the dough. The following are step by step instructions that will enable anyone to make a flavorful and tender pie crust and a perfect filling for all those juicy summer fruits that are coming into season.

Blackberry Pie (makes 1 double crusted 9" pie)

Pie Dough (enough for a double crusted pie)
2 1/4 cups + 2 TBS (12 oz) all purpose flour
1 1/2 tsp (8g) of salt
5 tsp (20g) sugar (optional if using for savory dish)
1 cup or 2 sticks (8 oz) butter
1/2 cup (4 oz) of very cold water (measure from a container of ice water)

Blackberry Pie Filling
1 3/4 cup (14 oz) of juice*
7 TBS (3.5 oz) granulated sugar
1/4 tsp salt
large pinch of fresh grated nutmeg (optional)
6 TBS (39 g) cornstarch
2 1/2 lbs of Blackberries*
1 TBS lemon juice
*this works well for any berries, or stone fruit, feel free to substitute or mix fruits. You can use fresh fruit or frozen fruit. The juice can be a number of things, if you are using frozen fruit, completely thaw out fruit and use all juice and liquid that comes from the fruit. If using fresh berries you could use water, or a fruit juice or crush some berries and mix with some water to create the liquid.

To make the pie dough:
As mentioned at the top of the post, the key to a tender crust is to keep everything very cold and work the dough very little. You can make it by hand or in a food processor. Ideally, if you have time and space, measure everything out and leave it in the refrigerator for a while to make sure even the flour and butter are very cold. If not, just make sure that the butter isn't sitting out for any length of time. Place all the dry ingredients in a bowl and cut the butter up into smaller cubes.
If using a food processor, pulse the mixture until it resembles cornmeal- careful not to go to far so that it looks like the dough is coming together (the butter has gotten too worked in at this point)
If making by hand, slowly work the butter into the flour until you have very small little pebbles of butter. Don't keep any of it in your hands for too long, I like to grab a large chunk of butter with some of the dry and pinch the butter into a flat sheet trying to work in as much flour as possible, then drop that piece and find the next chunk of butter. Continue doing that until all the large pieces are broken down. You can also use a pastry blender or fork to help make it so you're not making contact with the butter (to keep it from getting too warm).
After the butter is cut into the flour, add the water and if using the food processor, pulse a few more times to gently bring the dough together.
If doing by hand, pour the water in and then bring both hands down to the bottom of the bowl, and then bring them up through the mix, as if to fluff the mixture. Continue doing this until it looks like things are equally distributed. What this does is helps to distribute the water without much hand contact with the mixture. Look for pockets of water or sticky dough and break that up with pockets of dry ingredients. Mix just until the dough comes together then you can wrap it in plastic wrap or use a bag, and form it into 2 1/2" thick circles and wrap and chill the dough (you can leave this in the refrigerator for a few days, or if making ahead of time freeze for later).

To make the Blackberry Filling:
Make sure all the fruit (if frozen) is completely thawed or drained of any excess liquid. You can use all the liquid as part or all of the liquid called for in the recipe. Place the cornstarch into a small bowl, and add enough of the liquid so the cornstarch dissolves (about 1/4 cup) Pour the rest of the liquid into a large pan (either pot or saute pan) and add the juice, sugar, salt and nutmeg, if using. Bring to a boil and slowly whisk in the cornstarch mixture and bring back up to a boil. Make sure this comes to a complete rolling boil (so you see bubbles in the middle as well as the sides of the pan) and then take off the heat. Add the lemon juice and gently fold in the fruit. Spread this out on to a cookie sheet or large baking pan so that it can quickly and completely cool before putting it into the pie shell. This can be made a day a head of time. The cooler the mixture the better, not only will it make sure the pie dough isn't going into the oven warm, but it will also take longer for the filling to heat up in the oven, which means it will end up cooking less (a good thing since the filling is already totally cooked).

To Roll out the pie dough:

Make sure your pie dough has had at least an hour to rest and chill in the refrigerator. Using a lightly floured surface, roll out the pie dough (making sure to add more flour as necessary) until it's about 1/8" thick. Roll both portions of dough out, and place one back into the refrigerator until you are ready to assemble the pie. Using one of the rounds, line the bottom of the pie pan with the dough, making sure to center the dough, so you have enough to come up all sides of the pan and hang over the edge. Make sure the dough is pushed (from top/ excess dough that is hanging over) into the corners at the bottom of the pan. At this point you only need that dough to go out to the edge of the pie pan, not any further, so using the edge of the pie pan as a guide, trim the rest of the dough away. Place this in the refrigerator and let it sit at least 30 minutes so the dough has time to relax and chill. Take it out of the refrigerator and pour all the filling into the pie, making sure it's tightly packed and level on top. If using the top crust (you can take a shortcut and sprinkle strussel on top) Place the top crust on top of the pie and trim around the edge, leaving enough to tuck under the bottom crust (about 1/2" or so). Go back around an pressing the bottom and top crust together, gently tuck it under so you no longer see the bottom crust and then if you want decoratively crimp the edges. Make sure to put a few vents in the middle for steam to escape. Place the pie on a parchment or foil lined sheet pan and bake in a 425 degree preheated oven until the pie is a golden brown. This pie will take about 5 hours at least to fully cool before it will cut cleanly, so make sure to make it ahead of time to leave plenty of time for cooling. If you cut while the filling is warm at all it won't hold it's shape very nicely.

Sunday, August 16, 2009

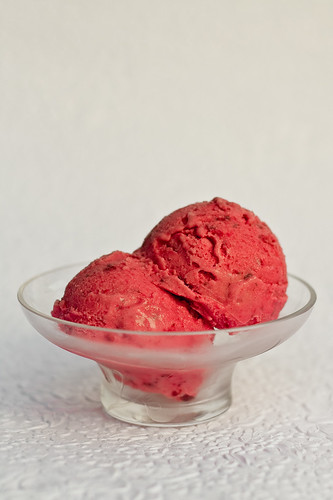
Fresh Strawberry Ice Cream/ Frozen Yogurt

Strawberry Ice Cream


Fresh. Simple. Full of flavor. Perfect. This ice cream has only 4 ingredients, but it produces a vibrantly flavored ice cream that is bursting with strawberry flavor. I had some heavy cream left over that I needed to use up and a freezer full of peak of the season strawberries and thought I would give this recipe I had found in Gourmet a try. As it turns out, I didn't have as much cream as I thought which turned out to my advantage because what was a simple and creamy strawberry ice cream turned into a wonderfully creamy but slightly tangy strawberry frozen yogurt. While it is still half cream the reduction of fat allowed for more strawberry flavor to come through. This had a great texture and involved no cooking! Give it a try. I will certainly be trying this with other fruits! I realize it's been over four weeks since my last post, but I have a few more posts in store so be sure to check back in the up coming week for some more summery foods!

Strawberry Frozen Yogurt (adapted from Gourmet)
(to make this an ice cream, use all cream instead of 1/2 yogurt and 1/2 cream)

1 lb of coarsely chopped strawberries (can be frozen and thawed out)
3/4 cup sugar
3/4 tsp lemon juice
1/8 tsp of salt
1 cup of heavy cream
1 cup of 2% or whole milk greek style* yogurt

Put the strawberries, sugar and lemon juice in a bowl. Let them stand for 30 minutes or so and then in a blender, blend half until smooth. If they are frozen and thawed out, they will be a lot softer and you might find that you can just mash them with a fork and that should break down enough of the strawberries. In a separate bowl, whisk together the yogurt and cream, add to strawberries and refrigerate until very cold**. Freeze using an ice cream maker. Enjoy!

*Greek style yogurt is thicker and creamier. If you have never tried it, buy some and check it out. It is a little more expensive than some other yogurts but it's thick creamy texture and mild flavor make it worth the price.

**I found another advantage of the frozen strawberries was, if they were just defrosted so the berries were soft but everything was still very cold, it made it so there is no need to chill the final mix.

Tuesday, July 7, 2009

Mango Salsa

Mango Salsa

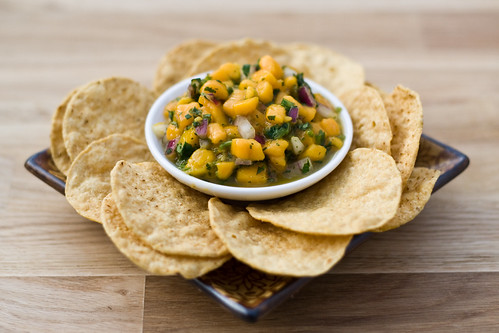
This is a very simple quick salsa, and I really don't use a recipe but have created one to share with you, especially for those who aren't comfortable cooking without one. Although this uses mango, you could easily substitute a number of different fruits like pineapple, peaches, plums, nectarines... feel free to also add some cucumber, radish or other veggies to give even more of a variation. This is great served alone with corn chips, but also can be used as a condiment for tacos, or grilled fish or meats, black bean soup...

Mango Salsa (makes about 2 cups)

2 small mangos finely chopped
1/2- 1 jalapeno seeded and finely chopped (if you want more heat, leave the seeds in)
1/3 cup finely chopped red onion
1/4 cup finely chopped cilantro (about 1/3 of a bunch- measure after chopping)
2-3 TBS freshly squeezed lime juice (1 to 2 limes)
salt to taste (start with 1/4 of a tsp, and if it tastes a little flat add more or if it's not acidic enough, add some more lime juice)

After chopping the onions, let them sit in very cold water for at least 10 minutes and this will remove some of the pungency. Make sure to strain all the water from them before adding them to the salsa. Combine everything in a bowl, and mix. This is best made the day it's served, but it benefits from sitting for an hour or so before serving.

Sunday, June 21, 2009

Macaroni and Cheese

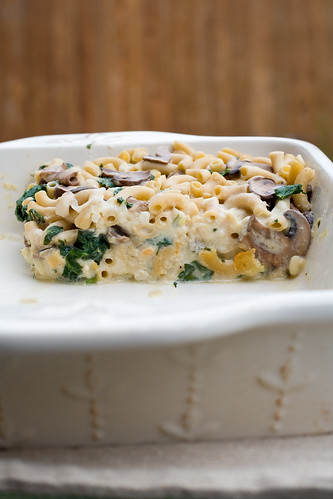
Here is a recipe for a healthier macaroni and cheese. In the picture I used whole wheat elbows and mixed in some spinach and mushrooms, but you could easily just use regular elbows and no veggies if you so desire. I left the bread crumbs off the top due to some time constraints but I will include the topping in the recipe. This is a recipe that I got from one of the cooking light cookbooks and have modified it a bit. The addition of the cottage cheese and sour cream add lots of flavor and creaminess without making it too unhealthy.

Mac & Cheese


Baked Macaroni and Cheese (serves 6)

1 egg
1 cup low fat cottage cheese
3/4 cup low fat sour cream
1/2 cup non fat or low fat milk
2 TBS grated onion
1/2 tsp salt
1/4 tsp ground pepper
2 cups (8 oz) grated cheese- you can use all cheddar or your favorite cheese or a combination whatever you have on hand
4 cups elbow noodles cooked (8oz uncooked)
1/2 cup dry bread crumbs
2 tbs melted butter or olive oil
pinch of salt, pepper, and paprika

Pre heat the oven to 350. In a bowl mix the egg through the ground pepper until mixed. Add in the cheese and mix, then fold in the cooked noodles. Spread into a greased 2 quart casserole pan and pat down to evenly fill the pan. In a small bowl, mix the bread crumbs, butter and salt, pepper, and paprika. Sprinkle over the pasta and cover the pan with foil. Bake for 30 minutes and uncover and bake another five minutes or until the bread crumbs brown.

*Feel free to add in anything you want along with the pasta. You could fold in some ham or broccoli, or maybe some roasted poblanos and use pepper jack cheese along with the cheddar cheese.

Monday, June 15, 2009

Strawberry Shortcake

Strawberry Shortcake


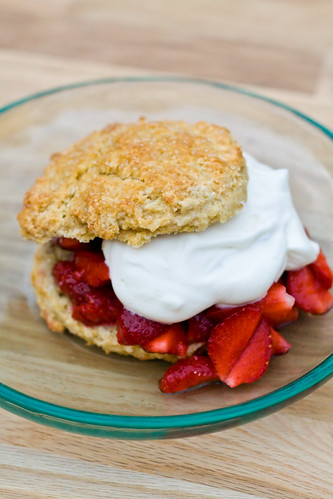
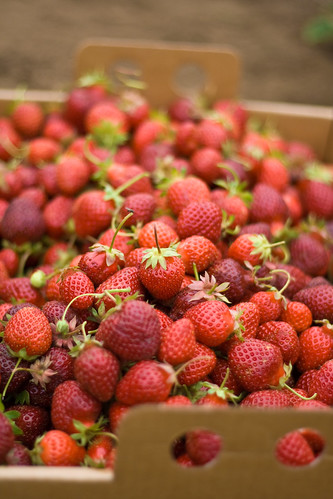
It's June and local strawberries are in season. I'm very lucky to live where I do, and have access to great produce and food. This past weekend we went to pick hood strawberries. Hood (as in Mt Hood) strawberries can be arguably some of the best strawberries to be found. We picked a whole flat, some of which I'll turn into jam and the rest will make for a great week of snacks! Later the same night I decided to make some strawberry shortcakes to highlight the beautiful strawberries we picked that morning. I didn't necessarily have a great go to shortcake recipe so I found one on King Arthur Flour. I think I was still inspired from my previous post experience! I made a few adaptions but it turned out to be a great biscuit for shortcake. I had perfect strawberries so there was very little need for sugar, but I did need some juice so I crushed a few strawberries and quartered the rest. I also included a few squirts of agave syrup and then topped it with some freshly whipped, lightly sweetened, organic heavy whipping cream

Shortcakes (from King Arthur Flour)
3 1/2 cups (14 7/8 oz) all purpose flour or pastry flour if you have it (I used half whole wheat pastry flour)
1 tsp salt
1 TBS baking powder
1/2 tsp baking soda
3 TBS sugar
4 oz (1 stick) cold butter cut into small pieces or thin slices
2 tsp vanilla
1 egg
1 cup buttermilk

Pre-heat the oven to 425 degrees F. You want the butter, buttermilk and egg as cold as possible. This will help to keep the biscuit a tender. Measure all the dry ingredients into a bowl and add the cut up butter. Break up the butter with your fingers or a pastry cutter until the mixture resembles cornmeal (you can also pulse this in a food processor). In a separate bowl mix the buttermilk, egg and vanilla and pour into the dry ingredients and mix with your hands or a spatula just until the ingredients are barely mixed, make sure not to over mix! The batter will be fairly soft so make sure you turn it out on a floured surface to roll and cut out the biscuits. I took a bit of a shortcut and used a large scoop and just scooped it onto a sheet pan. Place the biscuits on a greased or parchment lined sheet pan. I pressed them down with my hand slightly (dampened my hand with water so it wouldn't stick)- because I had scooped them, this wouldn't be necessary if they were rolled out. I finished them off with a dusting of raw coarse sugar before putting the biscuits into the oven. They baked for about 15-20 minutes. I pulled them out when I saw them lightly brown and the felt firm in the middle. These also made great biscuits for breakfast the next day, gently rewarmed!

Strawberries

Thursday, June 4, 2009

Ricotta Pancakes

Ricotta Pancakes

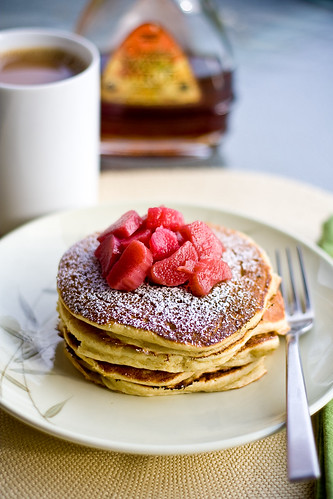
I had another post that I was going to put up today, until I made breakfast and found something more inspiring. My recipe and food choices for the day are usually guided by what's in the refrigerator and more importantly what needs to be used up. I had half a container of ricotta that wouldn't be good for much longer so I decided to try (again) some ricotta pancakes. I had made one recipe a while back but they were really thin and flat and didn't have a good texture at all. I had almost resigned to the fact that I didn't like ricotta in my pancakes until I tried this recipe. These may be my favorite pancakes! I got the recipe from The King Arthur Flour Bakers Companion Cookbook. I was short on a few ingredients, so I made a few modifications to the recipe, but they turned out so great that I think I will keep making them the same way, which is the recipe I posted below. I had some poached rhubarb which was a wonderful accompaniment to these very light and flavorful pancakes.

Ricotta Pancakes (made about 15 medium large pancakes)

3 eggs (2 of the whites separated and set aside in a clean bowl)
1 1/2 cups buttermilk
3 TBS sugar
2/3 cup of ricotta
1 tsp vanilla
3/4 cup all purpose flour
3/4 cup whole wheat pastry flour
1 tsp baking soda
1 tsp baking powder
1/4 tsp freshly grated nutmeg
1/2 tsp salt

In a small mixing bowl, sift the flours, salt, baking powder and baking soda and set aside. In another larger mixing bowl, mix the eggs (minus the two separated egg whites), and ricotta until smooth. Add in the vanilla and buttermilk and whisk until smooth. Begin whipping the egg whites and when they are white a frothy add one tablespoon of sugar. Continue whipping and slowly add the rest of the sugar and whip until medium peaks form. When you hold up the whisk, the egg white should stand up and flop over a little bit at the top. Mix the dry ingredients into the buttermilk mixture, whisk just until the flour is mixed in, be careful to not over mix or the pancakes can be tough. Don't worry if there are a few lumps left. Gently fold in the egg whites. Cook on a griddle over a medium heat. The batter will be very light but thick, so make sure that as you ladle out the batter the pancakes aren't too thick by taking the back of the spoon and spreading the batter out a little. They will take a little longer than regular pancakes to cook, so make sure to keep the heat low enough so they don't get to dark before they're done. Enjoy!

Thursday, May 28, 2009

Swedish Cream

Swedish Cream


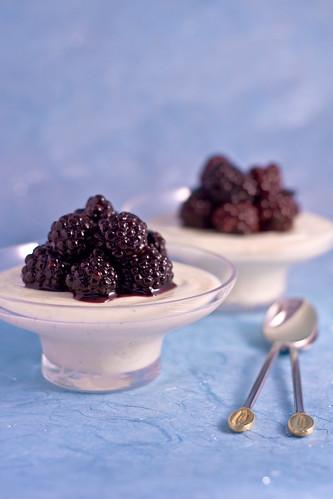
This is much like a panna cotta with the addition of sour cream, making it a little richer, creamier, and thicker than a normal panna cotta. With the addition of sour cream it pairs wonderfully with berries and all the stone fruits of summer. It couldn't be simpler and works well to make ahead of time. If you wanted to turn these out, as opposed to serving in a dish, you might want to increase the amount of gelatin to 1 tsp.

Swedish Cream -makes 6 small 1/3 cup servings
1 cup cream or half and half or milk*
1/2 cup sugar
3/4 tsp powdered gelatin (dissolved in 5 tsp water)
1 cup sour cream
1 tsp vanilla extract or 1 vanilla bean
1/2 tsp almond extract (optional)

*use milk if you want something lighter or cream if you are looking for something very rich

Combine the gelatin and water in a small bowl, make sure all the gelatin gets hydrated. Let sit for 5 minutes. In a separate pot scald (heat just before boiling) the cream with sugar and vanilla bean (if using). Take off the heat, add in the gelatin and stir to dissolve (remove the vanilla bean). Put the sour cream in a separate bowl and slowly pour the hot cream into the sour cream , stirring with each addition to make sure the sour cream gets completely mixed in, and then add in the vanilla extract and almond extract. Pour into serving dishes and and refrigerate until cool and set (at least 4 hours). I like to serve the Swedish cream with fresh fruit tossed with a little sugar.